
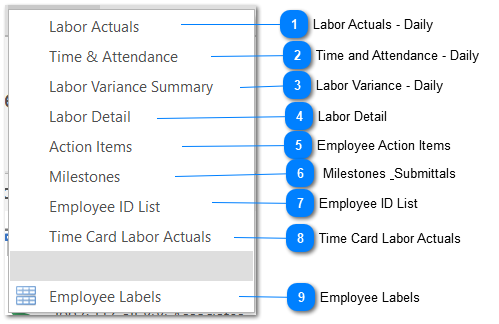
Reports Menu
The majority of ShopPAK reports are located on the Reports menu:
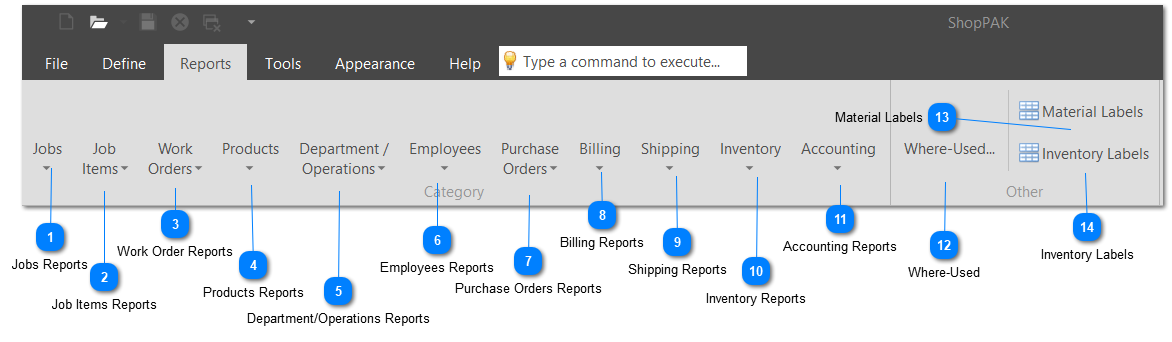
Many ShopPAK reports have already been covered in previous chapters. For example, Job specific reports are explained in "Jobs Form". This chapter focuses on reports that are not covered elsewhere in the User’s Guide.
Many job costing and tracking reports require a specific security access privilege before a user is allowed to generate the report. Others will simply omit privileged information if the user has inadequate security access privileges. See "Security" for information on defining Employee security profiles.
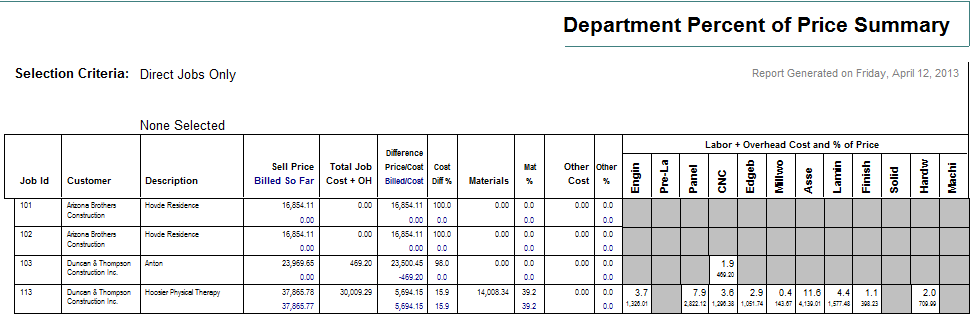
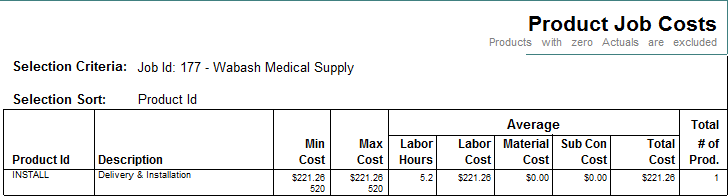
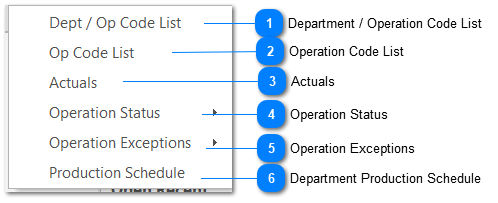
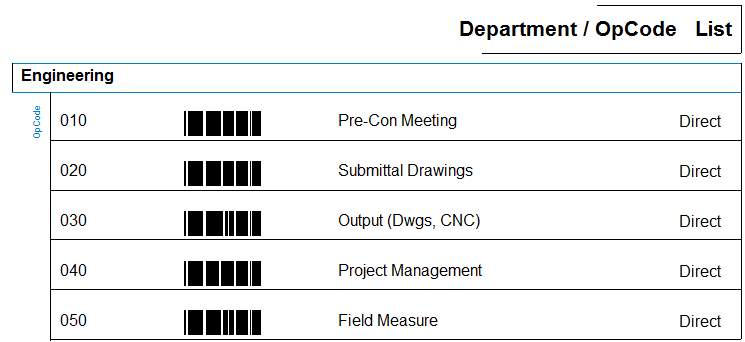
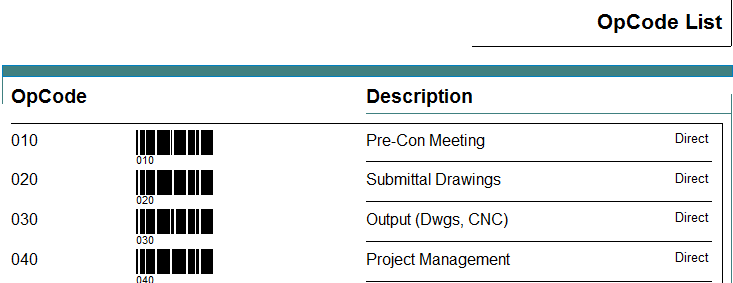
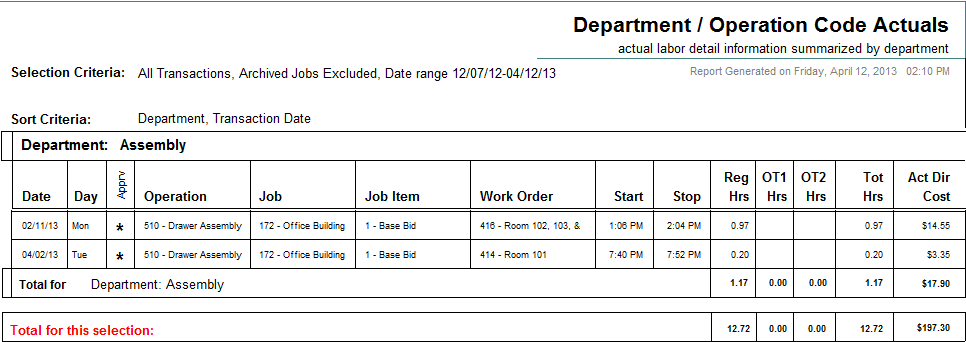
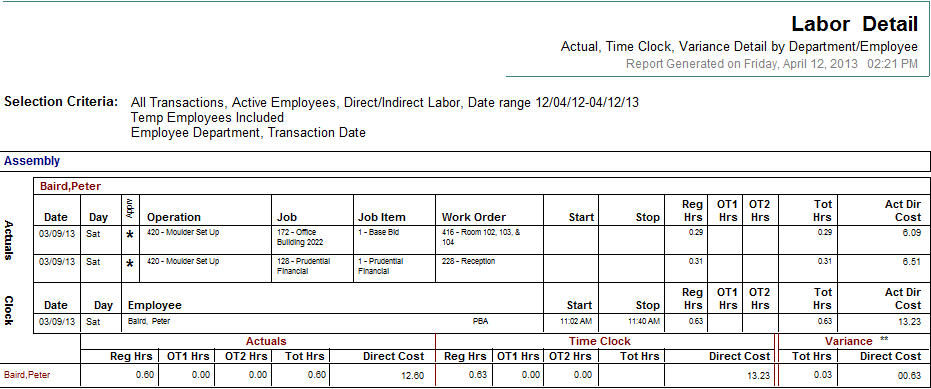
Department/Operations Reports ShopPAK lets you gather job cost information at the departmental level, and if you wish, down to the operation level. Gathering department and operation data helps you pinpoint production bottlenecks, inefficiencies, and hidden costs.
Collecting at the department and/or operation level is particularly helpful in tuning your ProjectPAK assemblies and estimates so they more accurately predict actual engineering, fabrication and installation costs.
|

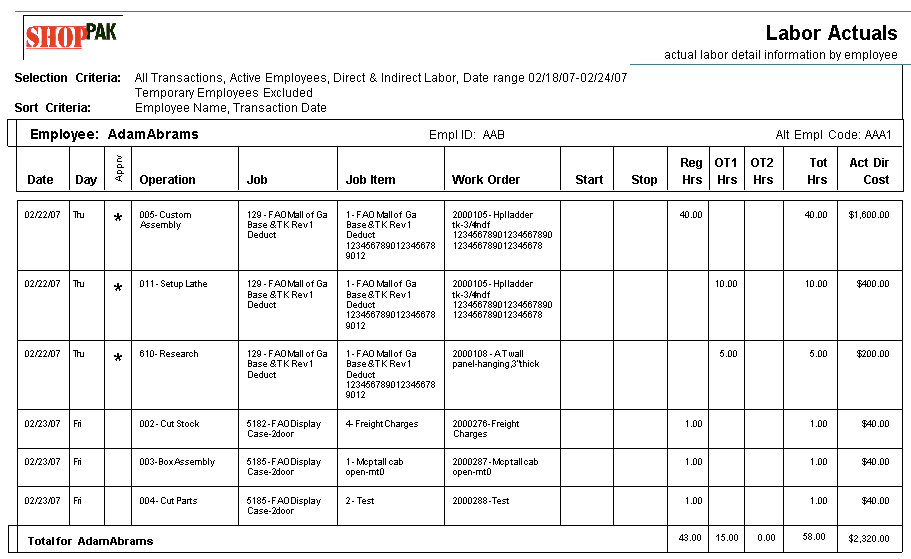
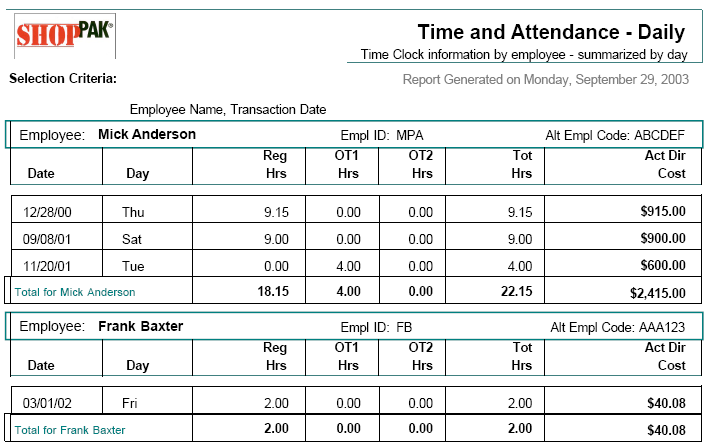
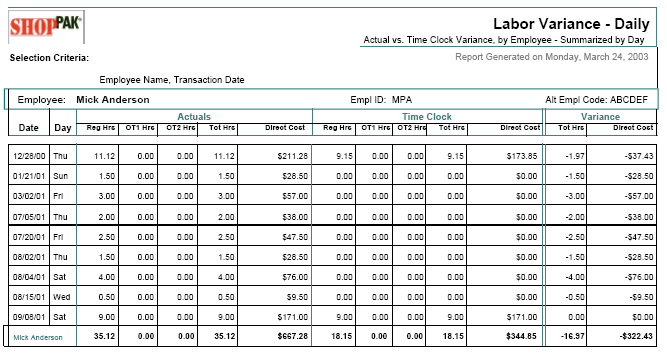
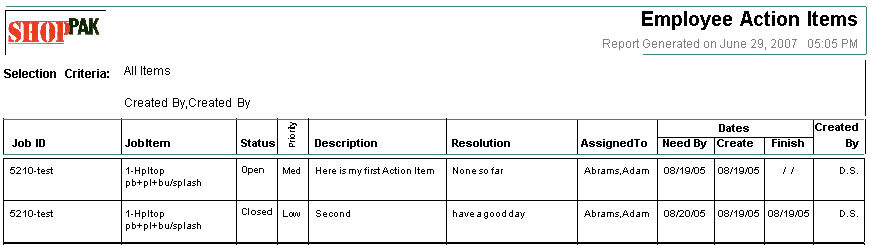
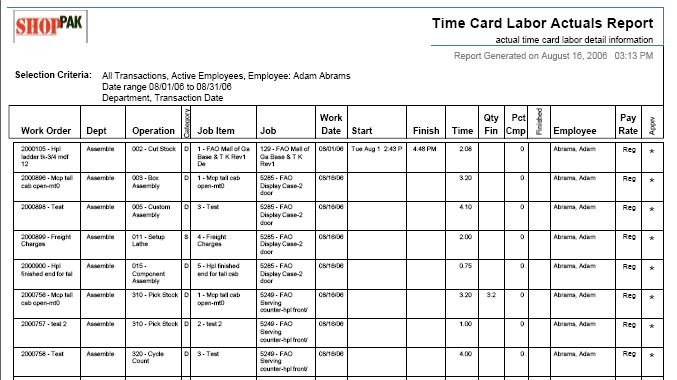
Employees Reports ShopPAK captures Time and Attendance and Job Cost information as employees log time against jobs. Reports allow you to gauge individual productivity, spot trends, and capture payroll information.
<TODO>: Insert description text here...
|
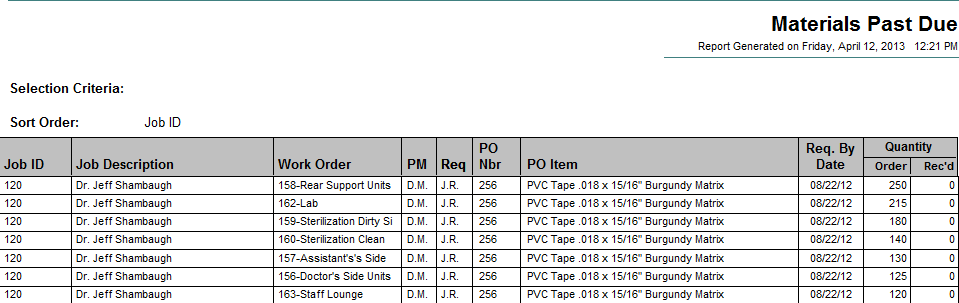
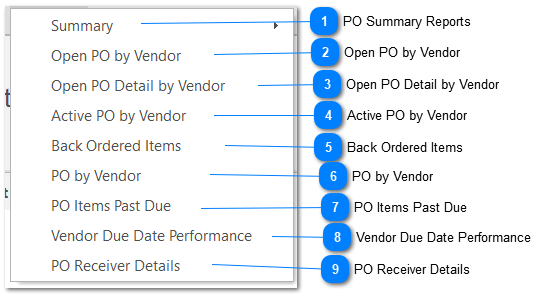
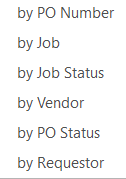
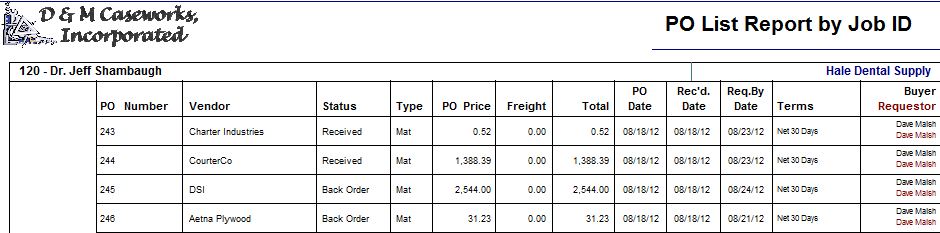
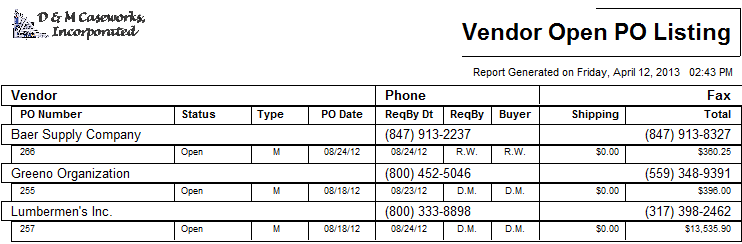
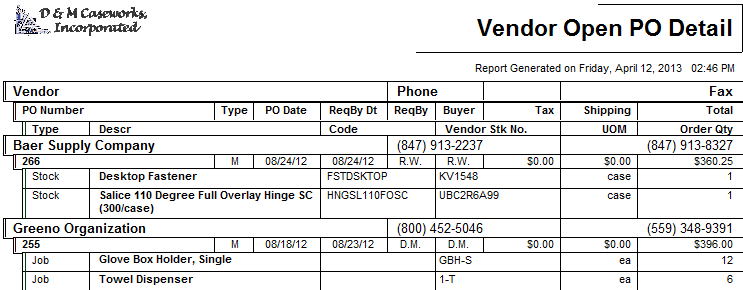
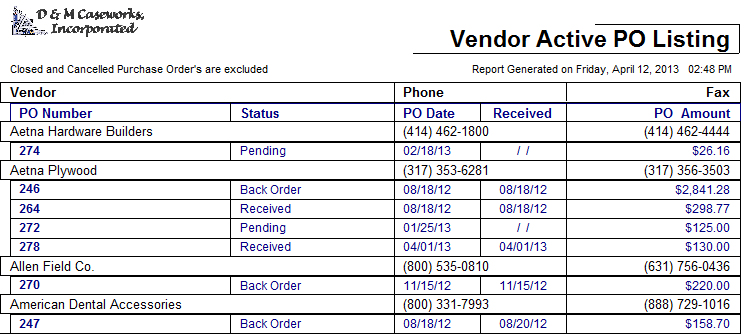
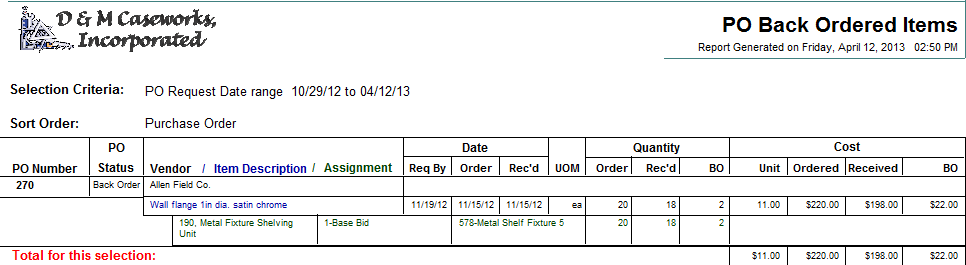
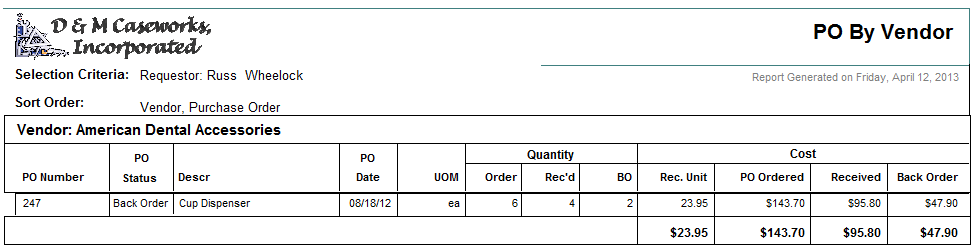
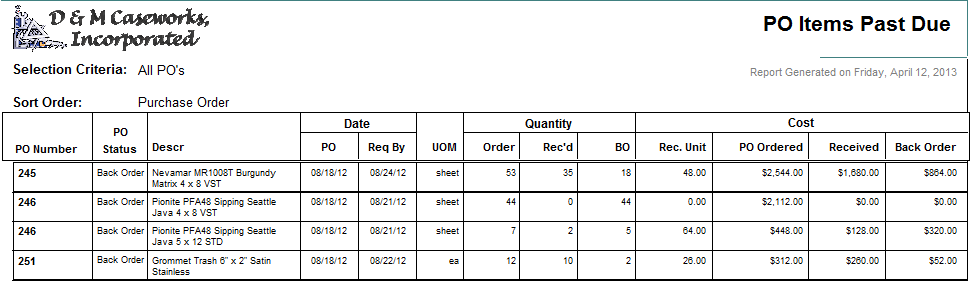
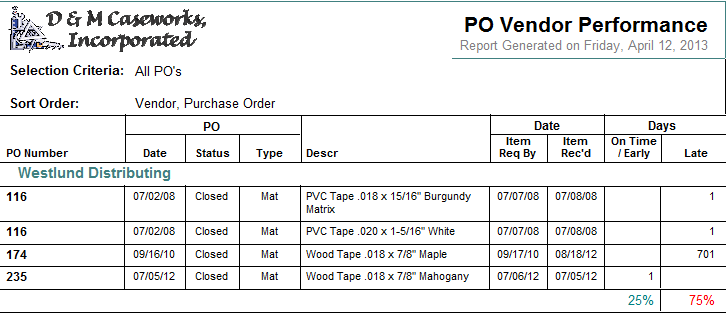
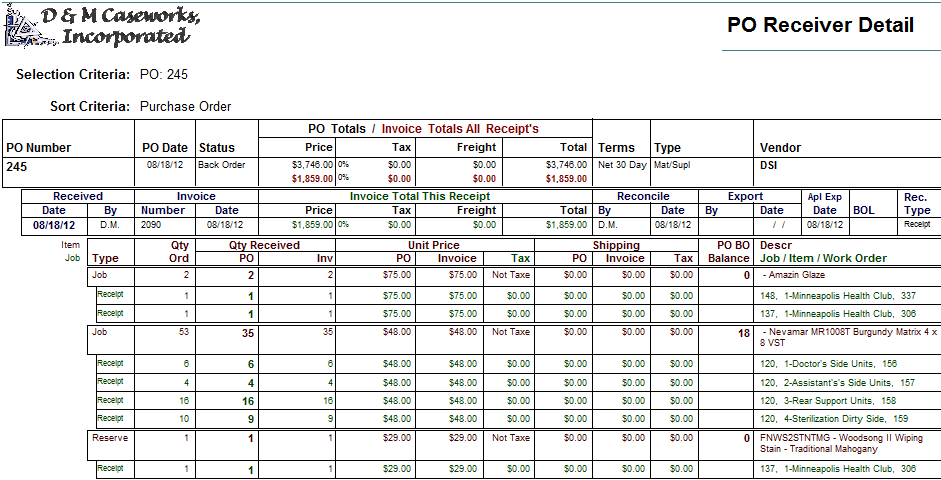
Purchase Orders Reports ShopPAK totally integrates Purchasing, Inventory, Job Costing, Receiving and Invoice Reconciliation. It produces a number of reports that help you manage this critical function.
|
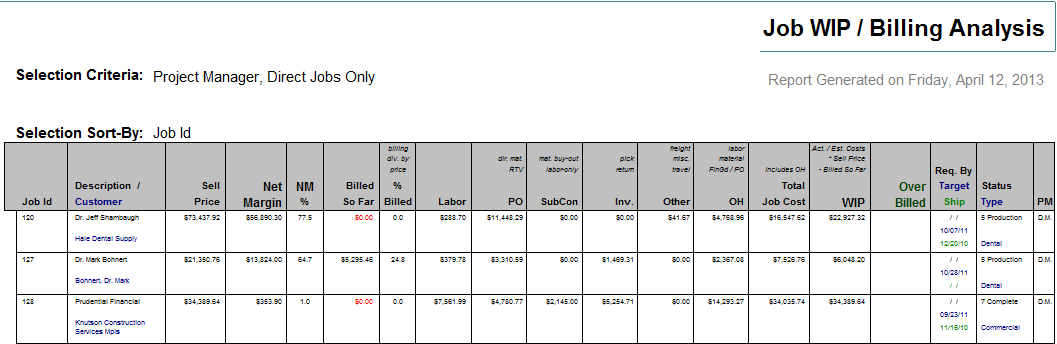
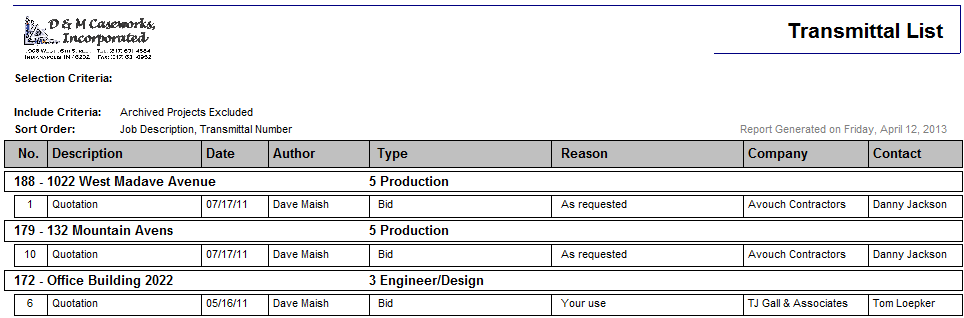
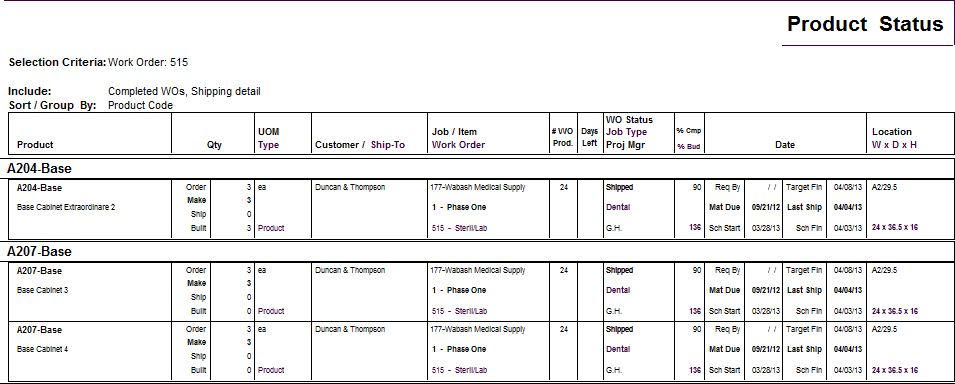
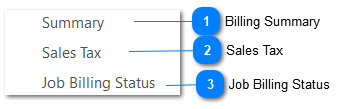
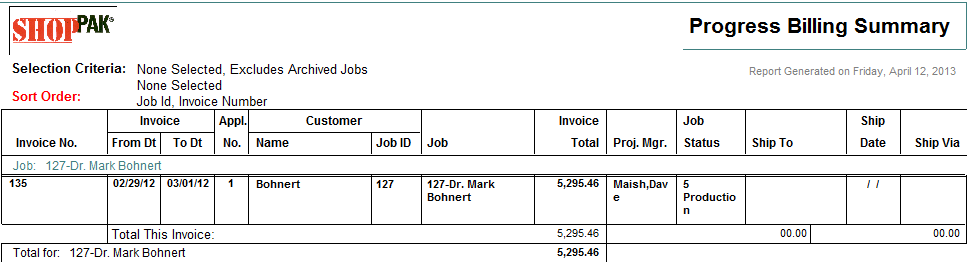
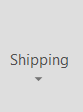
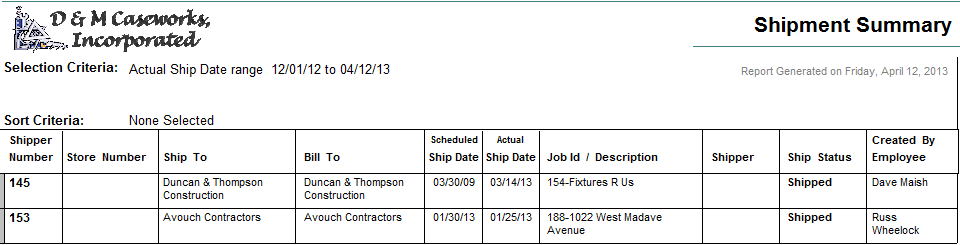
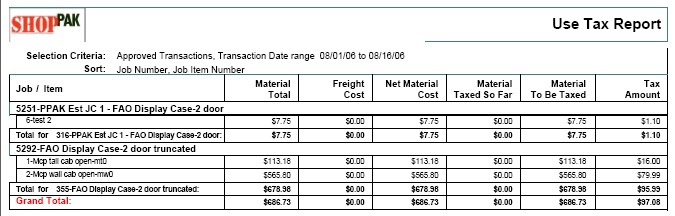
Billing Reports ShopPAK offers seamless integration between Shipping and Invoicing. It produces a number of documents and reports that help manage these critical functions.
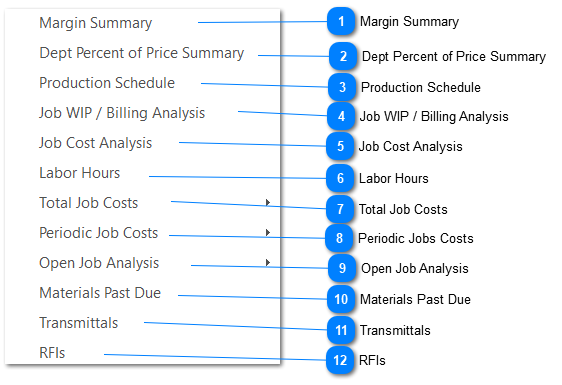
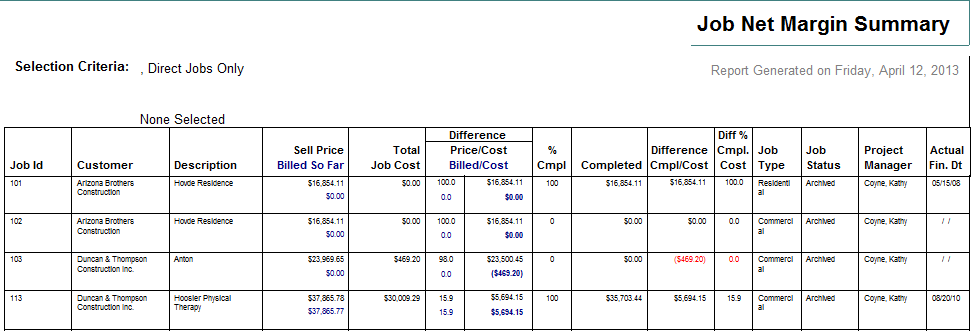
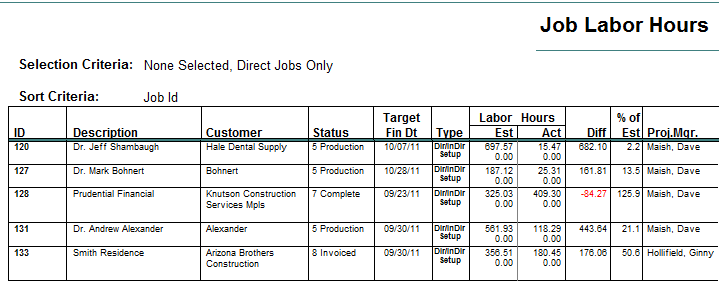
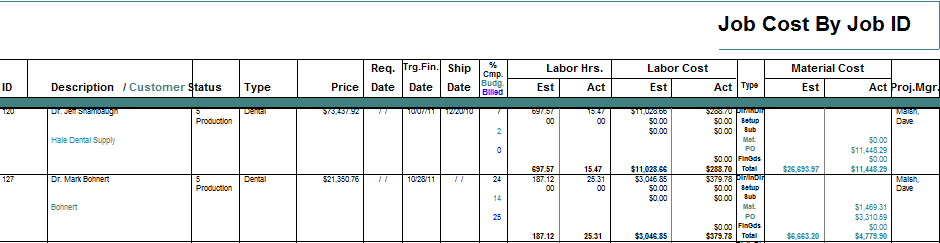
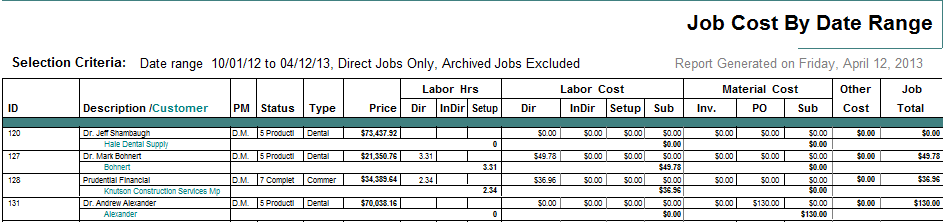
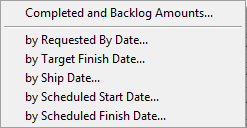
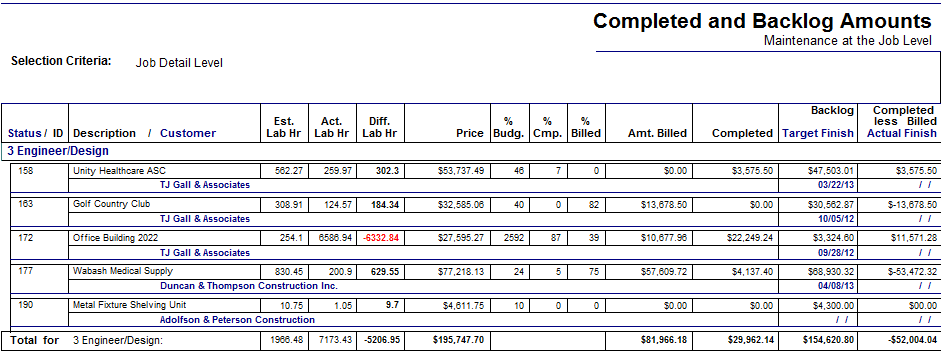
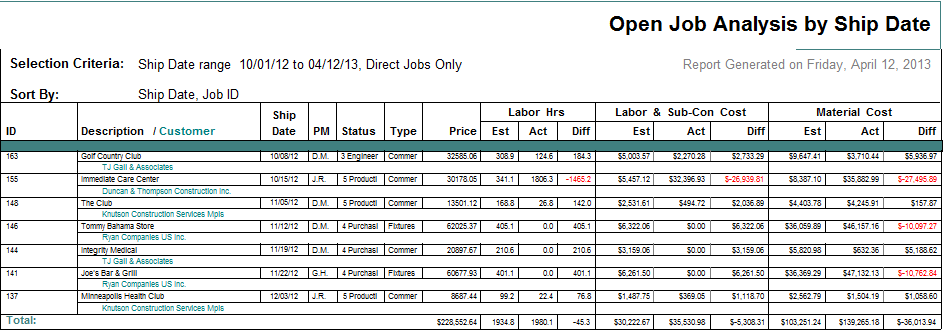
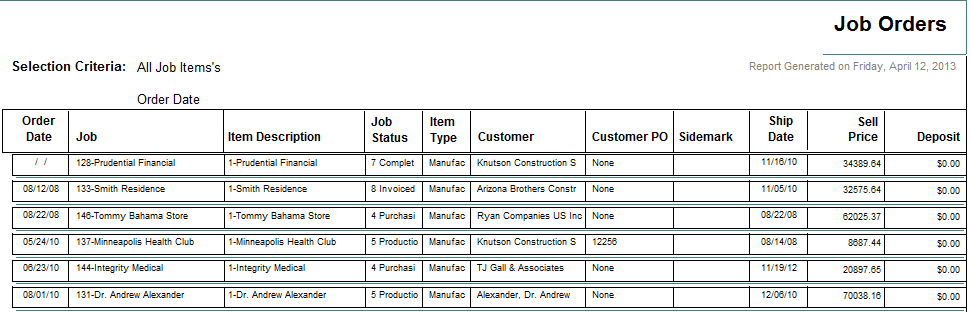
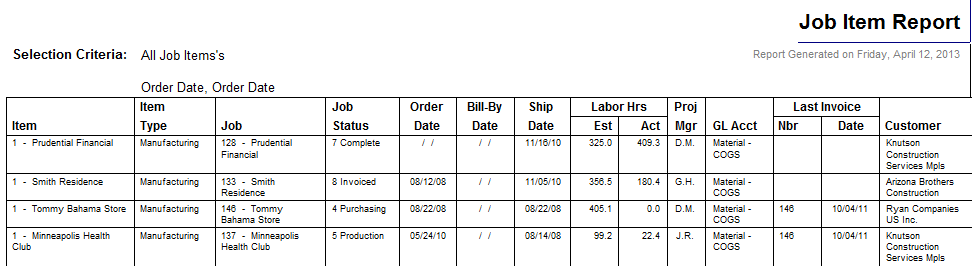
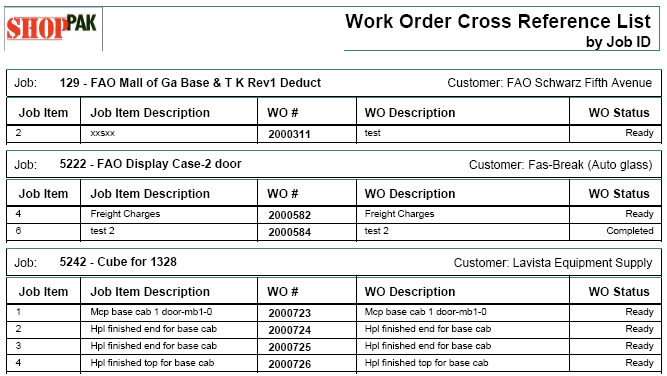
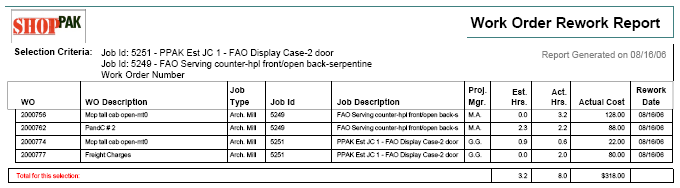
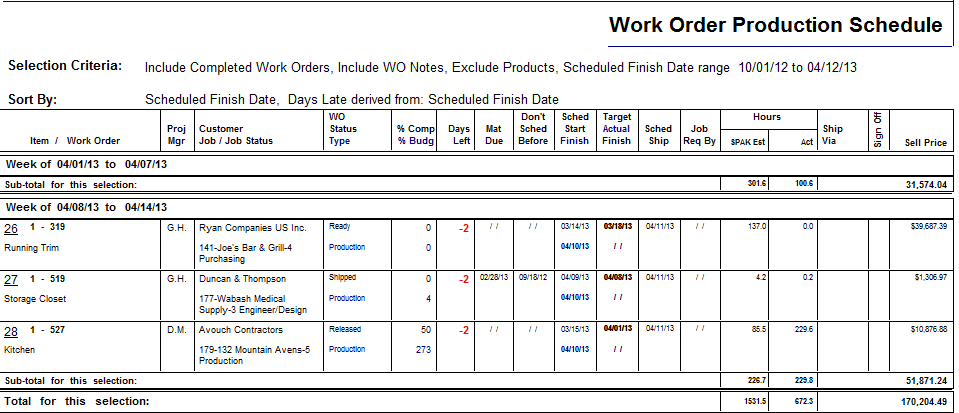
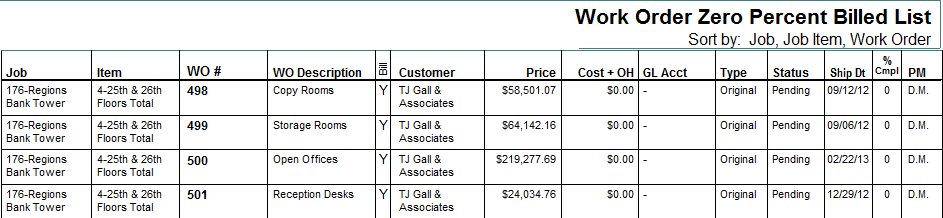
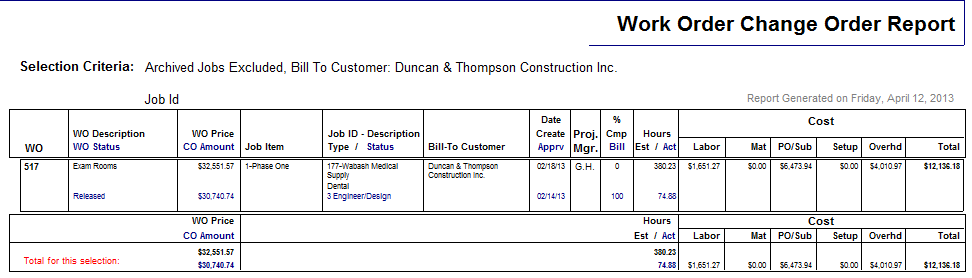
Note, under the Jobs report menu item, there are two very useful job oriented billing analysis reports:
See Jobs Reports in this chapter for details on the above reports.
|

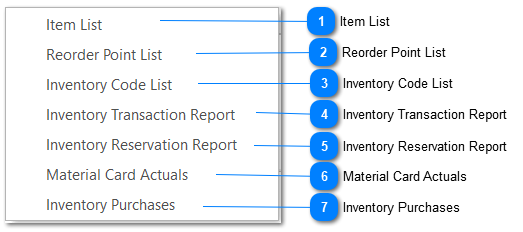
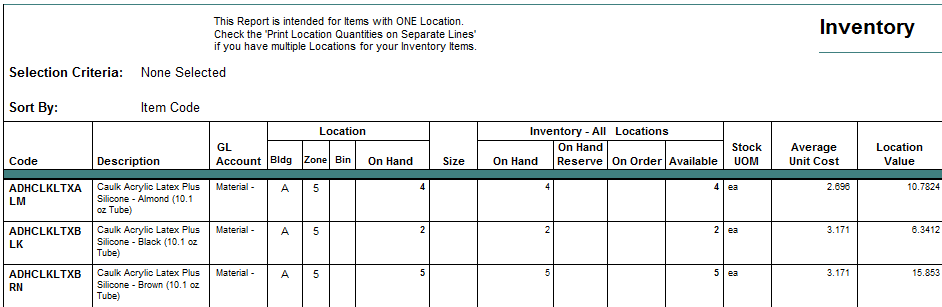
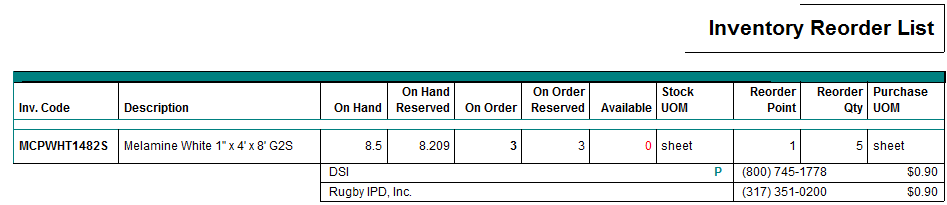
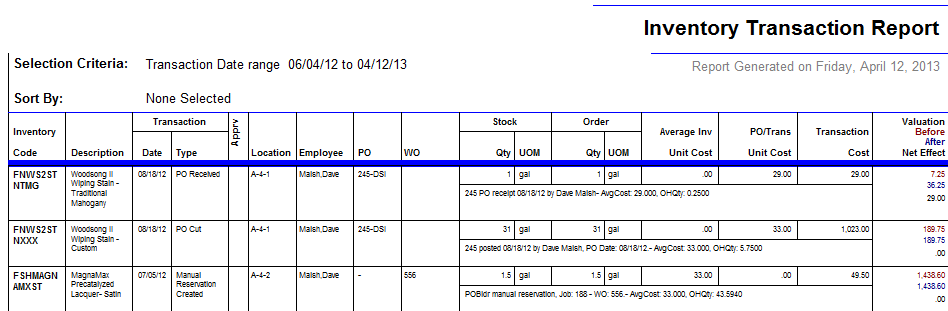
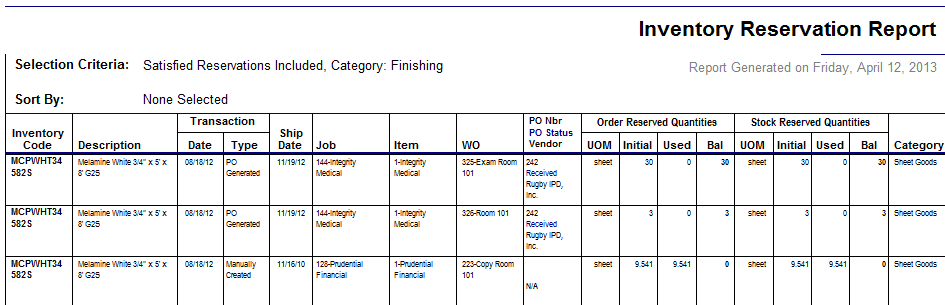
Inventory Reports ShopPAK’s inventory system is entirely transaction driven, which gives you the ability to analyze any aspect of it. For example, you can see when and who purchased, reserved, received, used, and returned inventory, and how many units were involved. You can easily determine inventory on-order and on-hand counts for your entire inventory, or any sub-group or individual item of inventory. Moreover, you can generate reports that tally asset valuation based on how you’ve defined your inventory valuation method à Weighted Average, FIFO, LIFO, or by individual unit.
|
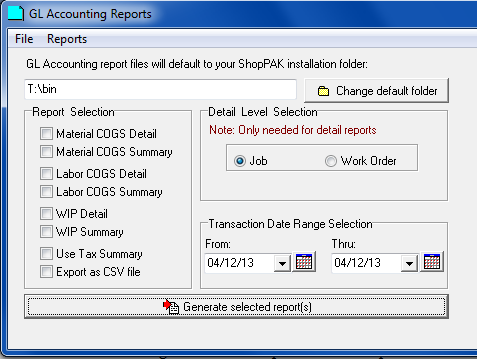
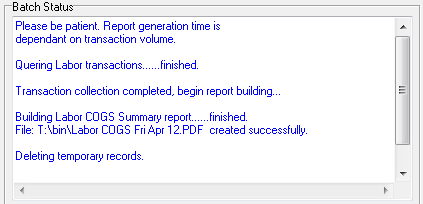
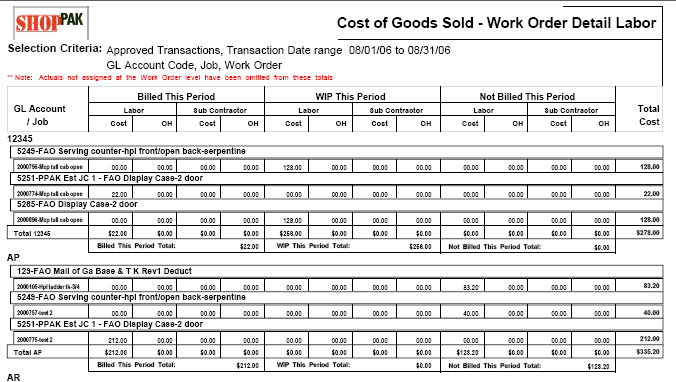
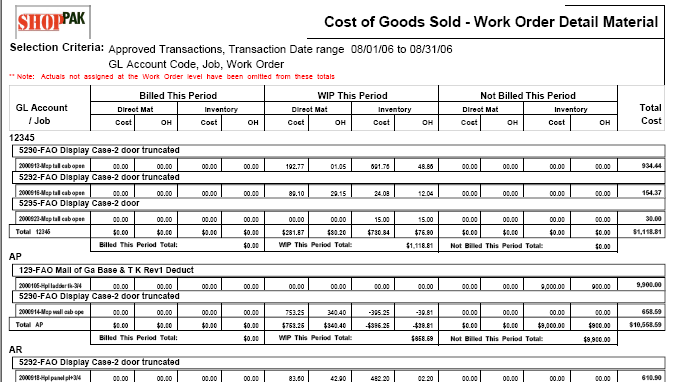
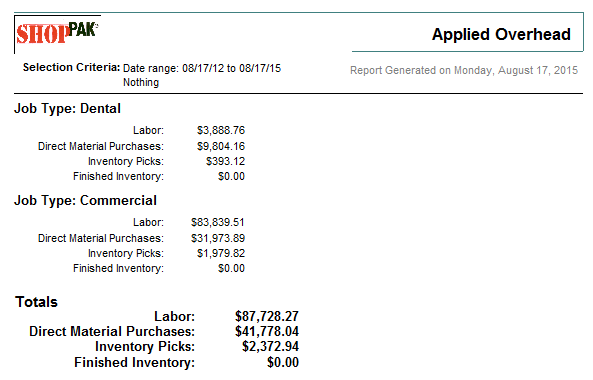
Accounting Reports
| ||


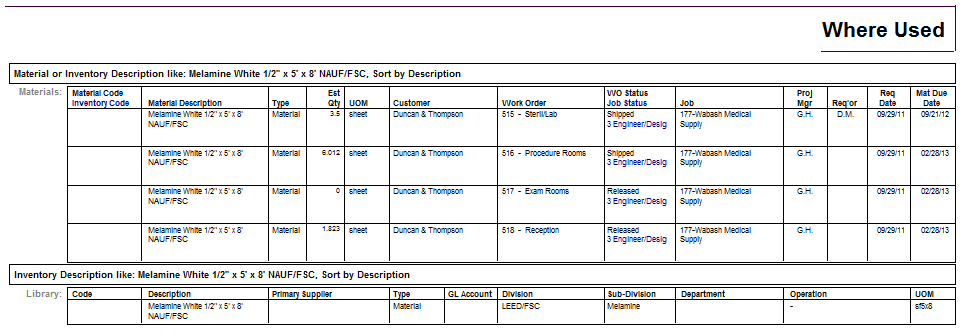
Where-Used The Where Used Report is a powerful utility to find where an item (using either description or code) is being referenced throughout ShopPAK………. and even ProjectPAK.
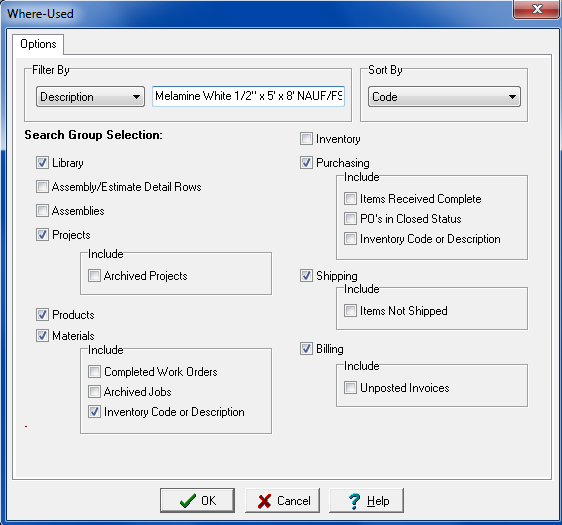 Filter By
Choose ‘Description’ or ‘Code’. Tells ShopPAK to either search on corresponding code or description fields. Enter either the entire character string, or partial character string, you want to search by.
Sort By
Tells ShopPAK to either order generated report on code or description.
Library
Tells ShopPAK to search the ProjectPAK Library for a match on the input description or code string.
Assembly/Estimate Detail Rows
Tells ShopPAK to search ProjectPAK Assembly and Estimate grid items for a match on the input description or code string.
Assemblies
Tells ShopPAK to search ProjectPAK Assemblies for a match on the input description or code string.
Projects
Tells ShopPAK to search ProjectPAK Projects for a match on the input description or code string.
Products
Tells ShopPAK to search ShopPAK Products for a match on the input description or code string.
Inventory
Tells ShopPAK to search Inventory for a match on the input description or code string.
Purchasing
Tells ShopPAK to search Purchase Order Items for a match on the input description or code string.
Shipping
Tells ShopPAK to search Ship Ticket Items for a match on the input description or code string.
Billing
Tells ShopPAK to search Regular Billing Items for a match on the input description or code string.
 |
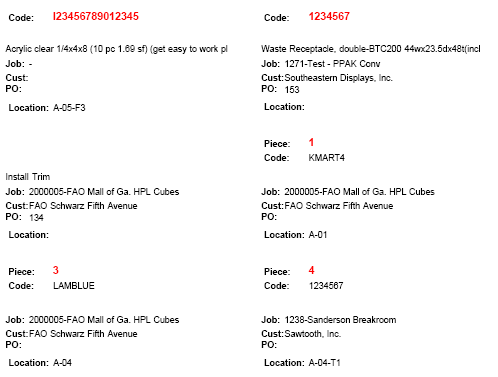
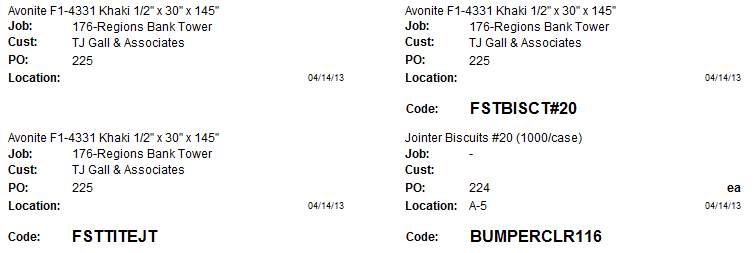
Material LabelsPrinting material labels is a two step process. First, labels are generated from either PO Builder, Purchasing, Receiving, or Inventory tabs. Second, they are printed via the Reports | Materials Labels menu item. Selecting the menu item displays a dialog box that you use to find the labels you wish to print. The reason we separate label generation from printing is because it allows you to batch labels together to print at one time. This is often more convenient and allows you to use label media more efficiently than immediately printing labels upon generation.
Filter
Several filters are available to pinpoint the labels you wish to print:
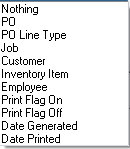 Select the filter, provide filtering target value(s), and then click the ‘Run Filter’ button. ShopPAK fills the print grid with generated labels that match your filtering selection.
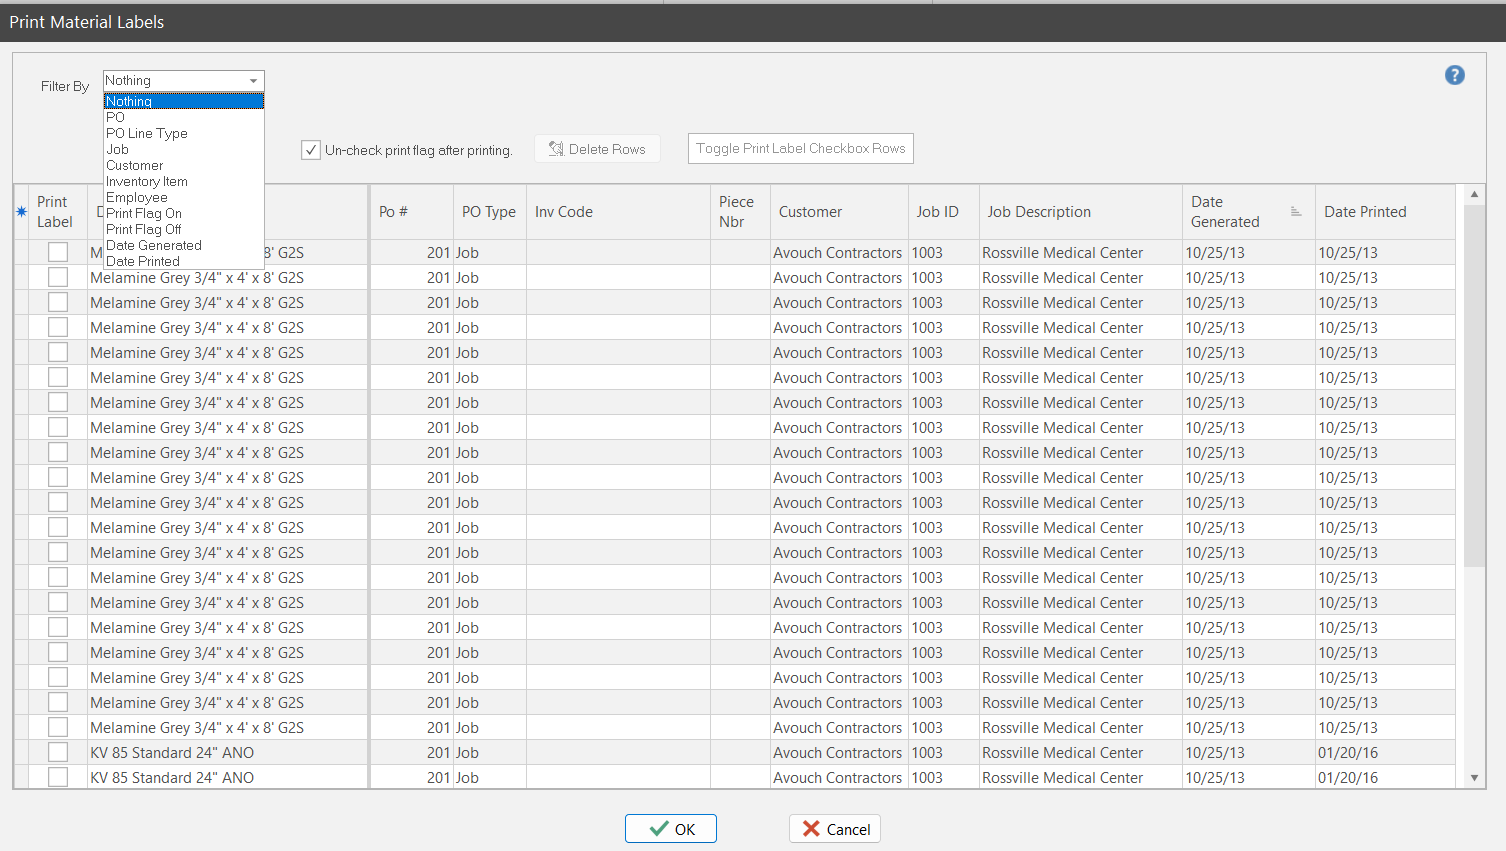 Un-check print flag after printing
Tells ShopPAK to un-check print flag after printing.
Grid Print Label CheckBox
Tells ShopPAK which labels you want printed when you click the OK Button.
Delete Rows Button
The dialog not only controls material label printing. It also controls deleting generated labels. It is a good ideas to delete generated labels after you print them so you don’t have printed labels in your material label print queue.
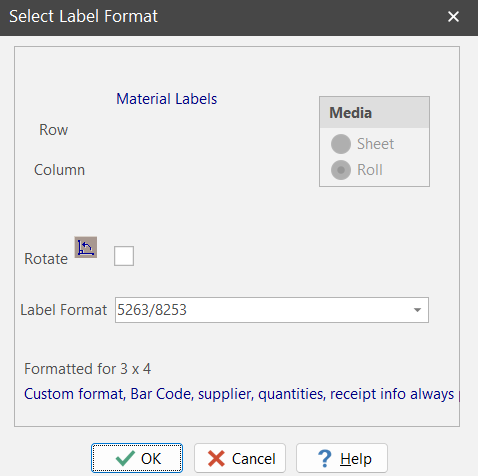
Material Label Size and Format
You have several options for label size and formatting. See "Setup and Options" for details on setting up material label defaults. Your defaults flow into the print setup dialog box. If you wish, you can override label size and format.
   After you print the labels, ShopPAK displays a message box asking if the labels printed OK.
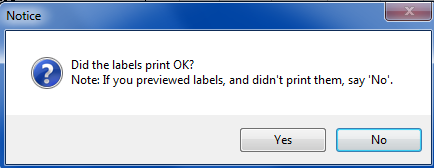 If they did, click Yes, ShopPAK automatically un-checks the rows you marked to be printed. If they didn’t print OK, say ‘No’. ShopPAK will not un-check the rows you requested for printing so you can fix the printer problem and then try printing again.
Deleting Labels
|
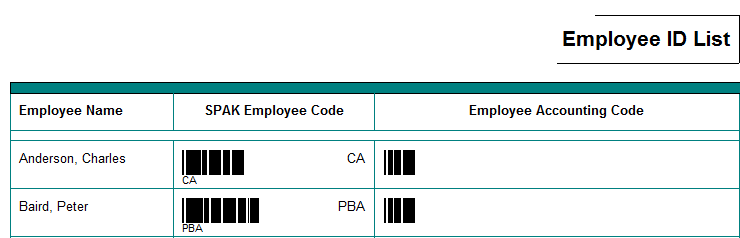
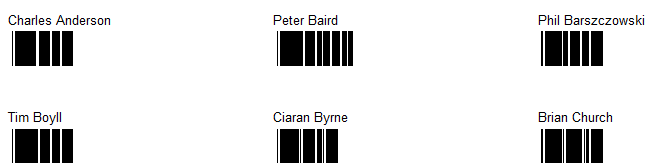
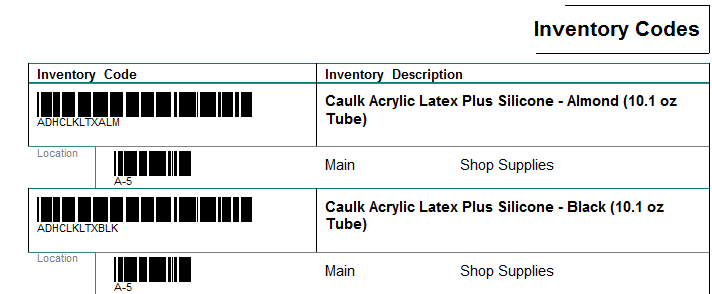
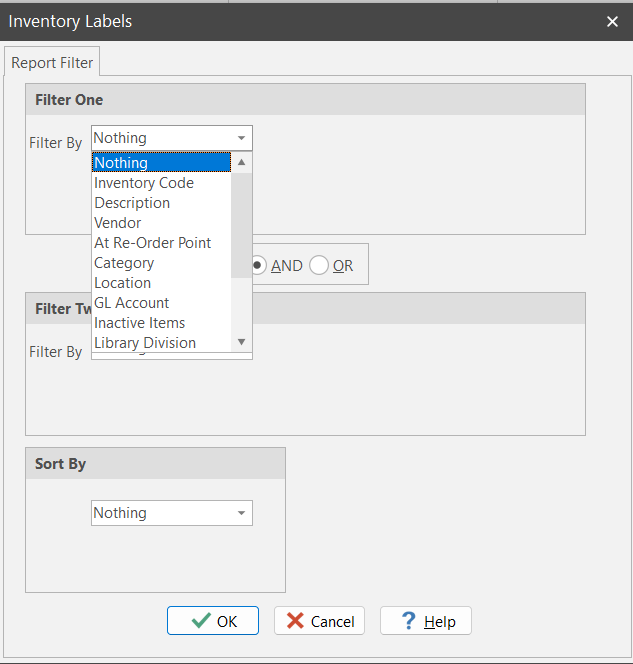
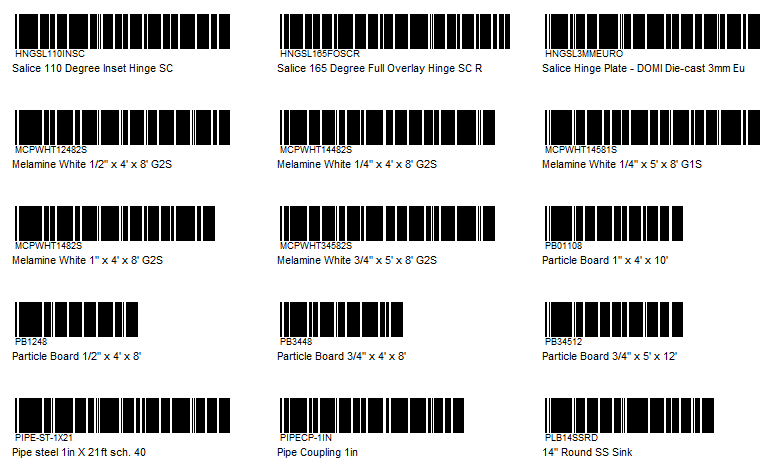
Inventory LabelsShopPAK prints Inventory labels if you want to bar code actual materials or bin locations. Since we give users the option of scanning barcodes when doing ‘picks’ and ‘returns’ against inventory, ShopPAK gives you an easy way of generating inventory item bar coded labels. (Note, ShopPAK also produces bar coded inventory ‘pick lists’ via the Jobs tab reporting function).
When you select the menu item to print inventory labels, ShopPAK first displays the label dialog box:
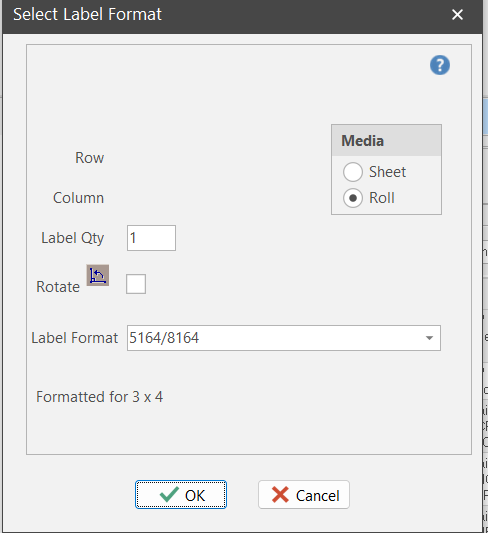 Tell ShopPAK which label media you want to use. Next, ShopPAK displays a dialog so you can pinpoint which inventory labels you want to produce. Use the filter and sort controls to generate only the labels you want to print.
  |