
Security
ShopPAK is built upon a powerful, shared database. Since it supports several concurrent users, and each user has specific responsibilities and duties, it is critical to limit each user’s security privileges to only those functions they need access to. Each user logs on to ShopPAK with their assigned ProjectPAK Logon ID and password. Once connected, ShopPAK uses their ShopPAK security profile to determine which screens and reports they can access, as well as, which ShopPAK records they can browse, create, modify, and delete.
From a security and database integrity standpoint, it is critical to grant only those privileges a particular user needs to do his or her job when defining their security profile. Be particularly careful with granting ‘Delete’ privileges and access to sensitive financial data.
Logging On to ShopPAK
1. Double click the ShopPAK desktop icon 
– or –
Click the “Start” button and select Programs | ShopPAK | ShopPAK.
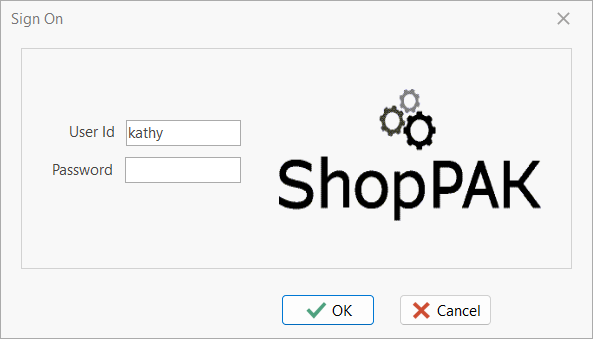
2. The ShopPAK “Sign On” window appears. Enter your ProjectPAK User ID and optional Password. Click the OK button.
ShopPAK System Administrator
Before anyone can use ShopPAK, the system administrator must first set up Security Profiles for each user and make sure each user has a ProjectPAK User ID and password. A security profile defines what a particular user can do in ShopPAK, and most importantly, what records they are allowed to modify in the ShopPAK database.
The first step is to set up the system administrator’s own security profile:
1. Log on to ShopPAK with the special system administrator User ID -> ShopPAK
2. Type the ShopPAK password sent to you under separate cover. This can be found in the cover letter that accompanied your ShopPAK software and user’s guide.
IMPORTANT: Do not share the “ShopPAK” password with other users.
|
The “ShopPAK” User ID gives you full access to ShopPAK security so you can set up your own security profile, as well as, the security profiles of other ShopPAK users.
Note: Normally the ShopPAK System Administrator has total rights in ShopPAK. In other words, they are a ‘power’ user. You should give yourself full rights including security. After establishing yourself as a ShopPAK user, we recommend logging off and then logging in with your own User ID.
|
Setting Up ShopPAK User Security Profiles
Before you can set up a security profile, the ShopPAK user must have a ProjectPAK User Logon.
Note: The User ID and Password will be the same when logging into either ProjectPAK or ShopPAK. ShopPAK privileges are not influenced by ProjectPAK privileges with the exception of some features in ShopPAK that update ProjectPAK Library Item information.
Refer to Chapter 16 in the ProjectPAK User’s Guide for more information on setting up User Profiles in ProjectPAK.
Only ShopPAK users need a ProjectPAK User ID and password. Shop floor production and installation employees who enter their time via Shop Floor Data Collection are not considered ShopPAK users, and thus, do not need ProjectPAK User IDs.
|
Define Employee
You must create an Employee record for every ShopPAK User. This applies to both ShopPAK users, as well as, production employees who use Shop Floor Data Collection. Before you can set up security access privileges for ShopPAK users, they must first be defined as an employee. See Employees under Setup and Options for more details.
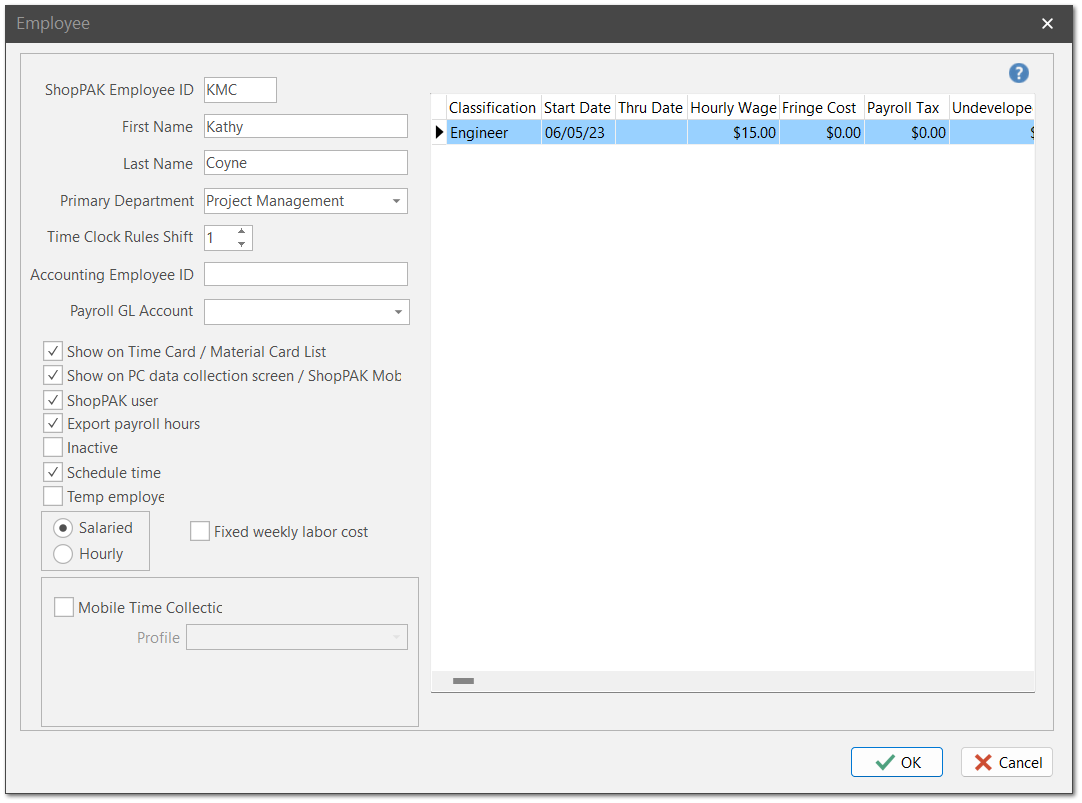
When defining employees that need login access to ShopPAK, the person must be defined as a ShopPAK user via the “ShopPAK user” check box. “Employee ID” and “First and Last Name” are the only other fields required to set up a user profile.
If the ShopPAK user will also be submitting job hours against jobs, or you’re defining a production employee who will be generating labor or material transactions, place a check in the “Show on Time Card / Material Card List” checkbox, as well as provide the employee’s wage information, explained in Setup and Options.
Define Security
To set up a ShopPAK Security Profile, select Define | Security from the ShopPAK menu.
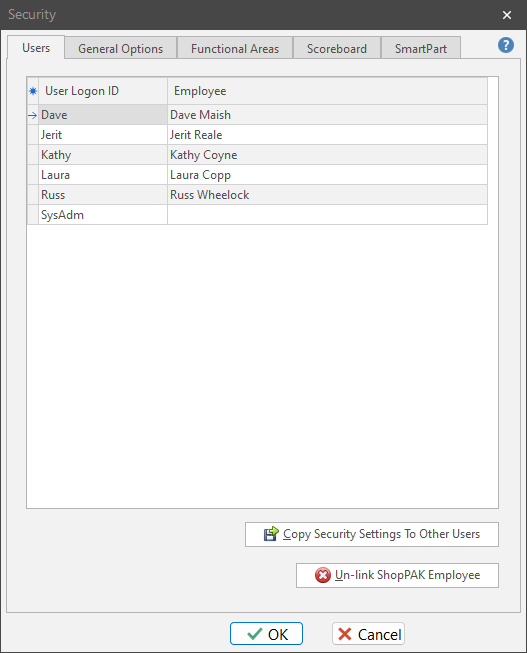
This displays the “Security” dialog box. The first tab lists all of the ProjectPAK User Logon IDs currently defined. Adjacent to each ProjectPAK logon is the associated ShopPAK Employee name that has been associated with the ProjectPAK logon ID.
TIP: Before you can set up a security profile, the ShopPAK user must have a ProjectPAK User Logon. The user must also have a ShopPAK employee record with the “ShopPAK User” box checked.
|
Adding and Changing Security Profiles
1. Choose the ProjectPAK logon of the person you wish to work with by clicking the row button or anywhere on the person’s grid row.
2. Click the “Employee” cell down arrow. A list of ShopPAK employees will be displayed. Select the ShopPAK employee that matches the ProjectPAK logon.

TIP: If you do not see the employee you want in the drop-down list, verify the ShopPAK Employee record has been setup properly. When defining employees that need login access to ShopPAK, the person must be defined as a ShopPAK user. Please refer to Setup and Options, for detailed information on setting up a ShopPAK Employee Profile.
|
3. Repeat for all of the employees you want to give ShopPAK access to.
Warning: Clicking on "Un-link ShopPAK Employee" removes the ShopPAK employee and clears out their ProjectPAK logon record of any ShopPAK, Scoreboard or SmartPART security directives.
|
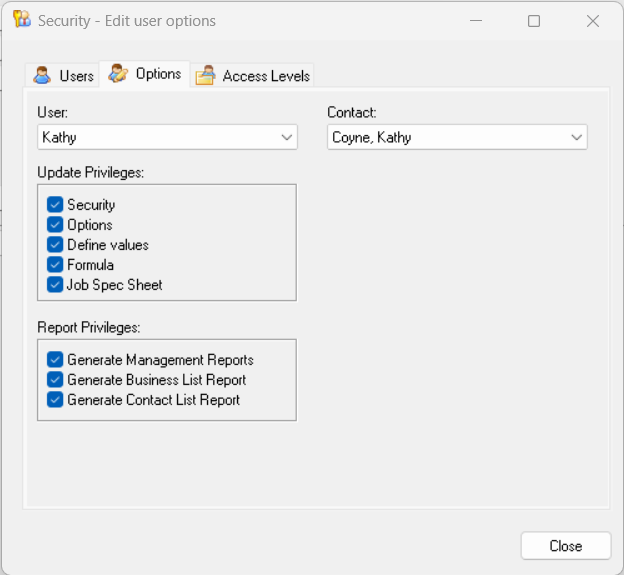
Security Options
Once you map a ProjectPAK User ID to a ShopPAK employee, click the employee row button. This highlights the row. Select the “General Options” tab at the top of the dialog box. This is where you assign general security access privileges. Make sure the employee’s name displays at the top of the dialog box so you are configuring the correct employee.

Define ShopPAK document contentEnables editing of document content defaults for Work Orders, Purchase Orders, Packing Slips, Invoices and Labels. See Setup and Options for detailed information on “Document Option” defaults.
| ||
Run 'apply overtime rules' & 're-calc salaried labor actuals'Allows a user to run two ShopPAK utilities: “Apply Overtime Rules”, (AutoCalc), against Labor Actuals and Time and Attendance records. Also run the salaried employee labor cost re-calc. This privilege is typically given to your accountant and/or bookkeeper.
|
Use “General Options” to grant or deny high-level ShopPAK privileges.
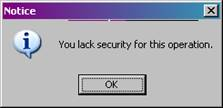
Users who lack the appropriate level of security privilege will receive an error message when they attempt to do something they don’t have authority for.
Functional Areas
ShopPAK has several functional tabs that run across the top of its main window. Clicking a main tab displays that function’s main form and any sub-forms available.
Use “Functional Areas ” to define which ShopPAK tabs a user has access to. If you choose “Denied” for a user, when that user logs on to ShopPAK, that functional area’s tab is hidden. If access is granted, set the database privilege the user enjoys when working on data located on the tab (read only, update, delete, etc.).
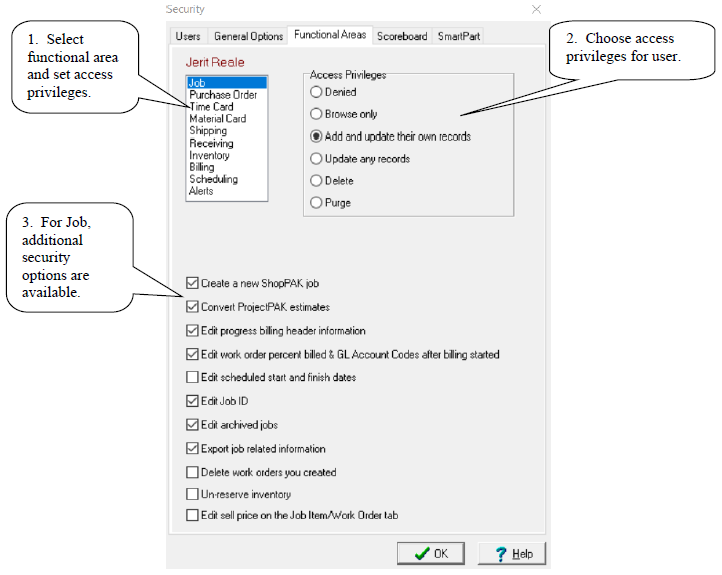
The list box located top left identifies ShopPAK’s main tabs, as well as, 2 additional functional areas (Scheduling and Alerts). Select the functional area you want to set up access privileges for. In the example above, the “Job” tab is currently selected.
When you select a ShopPAK functional area, a list of radio buttons display. The radio buttons are listed in order by expanding privilege. Privilege is cumulative. In the example above, the user has been given the privilege of creating and editing their own Jobs, Job Items, and Work Orders. Since privilege is cumulative, the user can also browse any Job in the ShopPAK database. However, the user in this example is denied the privilege of updating jobs they haven’t created themselves, nor are they allowed to delete or purge jobs from the ShopPAK database.
Job General Security Options
Create a New ShopPAK Job
Allows a user to create a new ShopPAK job.
Convert ProjectPAK estimates
Convert a ProjectPAK Project / Estimate into a first-cut ShopPAK Job or append an estimates to an existing ShopPAK Job when converting change orders.
Edit progress billing header information
Grants access to the Progress Billing sub tab on the Progress Billing sub-tab of a Job.
Edit work order percent billed & GL Account Codes after billing started
Allows a user to manually override the Percent Billed value and COGS Accounting code assignment at the Work Order level after Billing has started. This privilege is typically given to your accountant and/or bookkeeper.
Edit Scheduled Start and Finish Dates
Allows a user to change the Job, Job Item, Work Order, and Department Scheduled Start and Finish dates. If you use the ShopPAK Scheduler program, you may want to turn off the ability for certain users to edit schedule start and finish dates.
Edit Job ID
Allows a user to change the Job ID of a job.
Edit ‘Archived’ Jobs
Allows a user to make changes to a job that has moved into ‘Archived’ status.
Export job related information
Allows a user to export job related information to third party manufacturing software packages.
Delete work orders you created
Even though a user doesn't have delete privilege on the job (and associated elements within the job), you can give them the authority to delete a work order -- provided they created it.
Un-reserve Inventory
On the Job and Work Order details sub-tab, there is a button to un-reserve unused inventory reservations. You must explicitly grant this security privilege to users before they are allowed to remove unused inventory reservations.
Edit Sell Price on Job Item / Work Order Tab
Allows a user to edit sell price at the job item and work order level via the Job Item / Work Order tab.
Purchasing General Security Options
Access Vendor Reconciliation Tab
Allows user access to the vendor invoice reconciliation tab in the Purchasing area.
Receiving Specific General Security Options
Enable 'Set Qty Received to Qty Outstanding button
Allows user access to the button that automatically sets ALL rows of a receiver to the PO Item order quantity. If a user abuses this power button, we recommend you do not give them this privilege and instead, require them to fill in receive quantity on each row of the purchase order.
Job, PO Builder and Purchase Order Access Privileges
|
Radio Button
|
Privilege
|
|
Denied
|
Job/PO tabs are hidden. Access denied.
|
|
Browse Only
|
View any Job/PO but can’t change them.
|
|
Add and update their own records
|
Create and edit only their own Job /PO.
|
|
Update any records
|
Edit any Job/PO in the database.
|
|
Delete
|
Delete their own Job/PO they’ve created. Note: PO’s can only be deleted before they are actually received.
|
|
Purge
|
Delete any Job/PO in the database.
|
Time Card Tab Access Privileges (Time & Attendance Payroll Hours and Job Costs)
|
Radio Button
|
Privilege
|
|
Denied
|
Tab is hidden. Access denied.
|
|
Browse own time
|
View their own time & attendance and job cost time cards.
|
|
Add and update own time
|
Create and edit their own time & attendance and job cost time cards.
|
|
Delete own time
|
Delete their own time cards.
|
|
Supervisor
Supervisor (approve own time)
Browse any employee time
|
Special security setting that allows a supervisor to edit and approve time of their subordinates. When choosing this option, select employees that report to the supervisor being set up.
Same privileges as 'Supervisor', but allows user to also approve their own time. If you want a user to be able to edit and approve their own time, choose this option and don't choose any subordinates.
View any employee’s time card.
|
|
Add and update any employee time
|
Create and edit any employee’s time & attendance and job cost time cards.
|
|
Delete any employee time
|
Delete any employee’s time & attendance or job cost daily time card entries.
|
|
Approve actuals
|
Approve any employee’s job cost time card entries.
|
|
Purge
|
Delete any employee’s time card.
|
Material Card Tab Access Privileges (Inventory ‘Pick’ and ‘Return’ transactions)
|
Radio Button
|
Privilege
|
|
Denied
|
Tab is hidden. Access denied.
|
|
Browse Only
|
View any material card but can’t change them.
|
|
Add and update
|
Create and edit any material card.
|
|
Delete
|
Delete their own material cards they’ve created.
|
|
Approve Actuals
|
Approve inventory ‘Pick’ and ‘Return’ transactions for any employee.
|
|
Purge
|
Delete any inventory material card in the database.
|
Shipping, Receiving, Inventory, and Billing Tab Access Privileges
|
Radio Button
|
Privilege
|
|
Denied
|
Tab is hidden. Access denied.
|
|
Browse Only
|
View any of these records but can’t make changes.
|
|
Add and update
|
Create and edit these types of records.
|
|
Delete
|
Delete their own records of these types.
|
|
Purge
|
Delete any of these record types in the database.
|
Scheduling Access Privileges
The Scheduler is a separate application that is integrated with the rest of ProjectPAK and ShopPAK. We control security for the scheduler via the ‘Scheduling’ access privileges. See the Scheduler User’s Guide for more information on these security settings.
|
Radio Button
|
Privilege
|
|
Denied
|
Access denied. Can not run the Scheduler.
|
|
Print production schedule Gantt charts
|
Print master production schedule Gantt Charts and reports.
|
|
Edit employee calendars
|
Create and edit employee calendars.
|
|
Define trial schedules
|
Create trial schedules and the next master production schedule.
|
Alerts Access Privileges
NOTE: Alerts don’t have a specific tab in ShopPAK. Functionality is located throughout ShopPAK’s other windows and dialog boxes.
|
Radio Button
|
Privilege
|
|
Denied
|
Access denied. Can’t create alerts.
|
|
Set up own alerts
|
Create and set up alerts and browse them via Alert Browser window.
|
|
Browse any employee’s alerts
|
Browse own as well as other users’ alerts.
|
|
Set up any employee alerts
|
Create and set up alerts for any users.
|
|
Delete any employee’s generated alerts
|
Delete any employee alerts.
|
Scoreboard Access Privileges
Scoreboard is a separate application that is integrated with the rest of ShopPAK. We control security for Scoreboard via the ‘Scoreboard’ access privileges. See the Scoreboard User’s Guide for more information on setting up Scoreboard security privileges.
SmartPART Access Privileges
SmartPART is a separate application that is integrated with the rest of ShopPAK. We control security for SmartPART via the ‘SmartPART’ access privileges. See Chapter 2 Security in the SmartPART User’s Guide for more information on setting up SmartPART security privileges.