
Work Order Details
The first sub tab, “Work Order Details”, contains descriptive information about the Work Order, important dates, estimated and actual hours, and tracking percentages. Required fields include: Description, Purpose and Status.
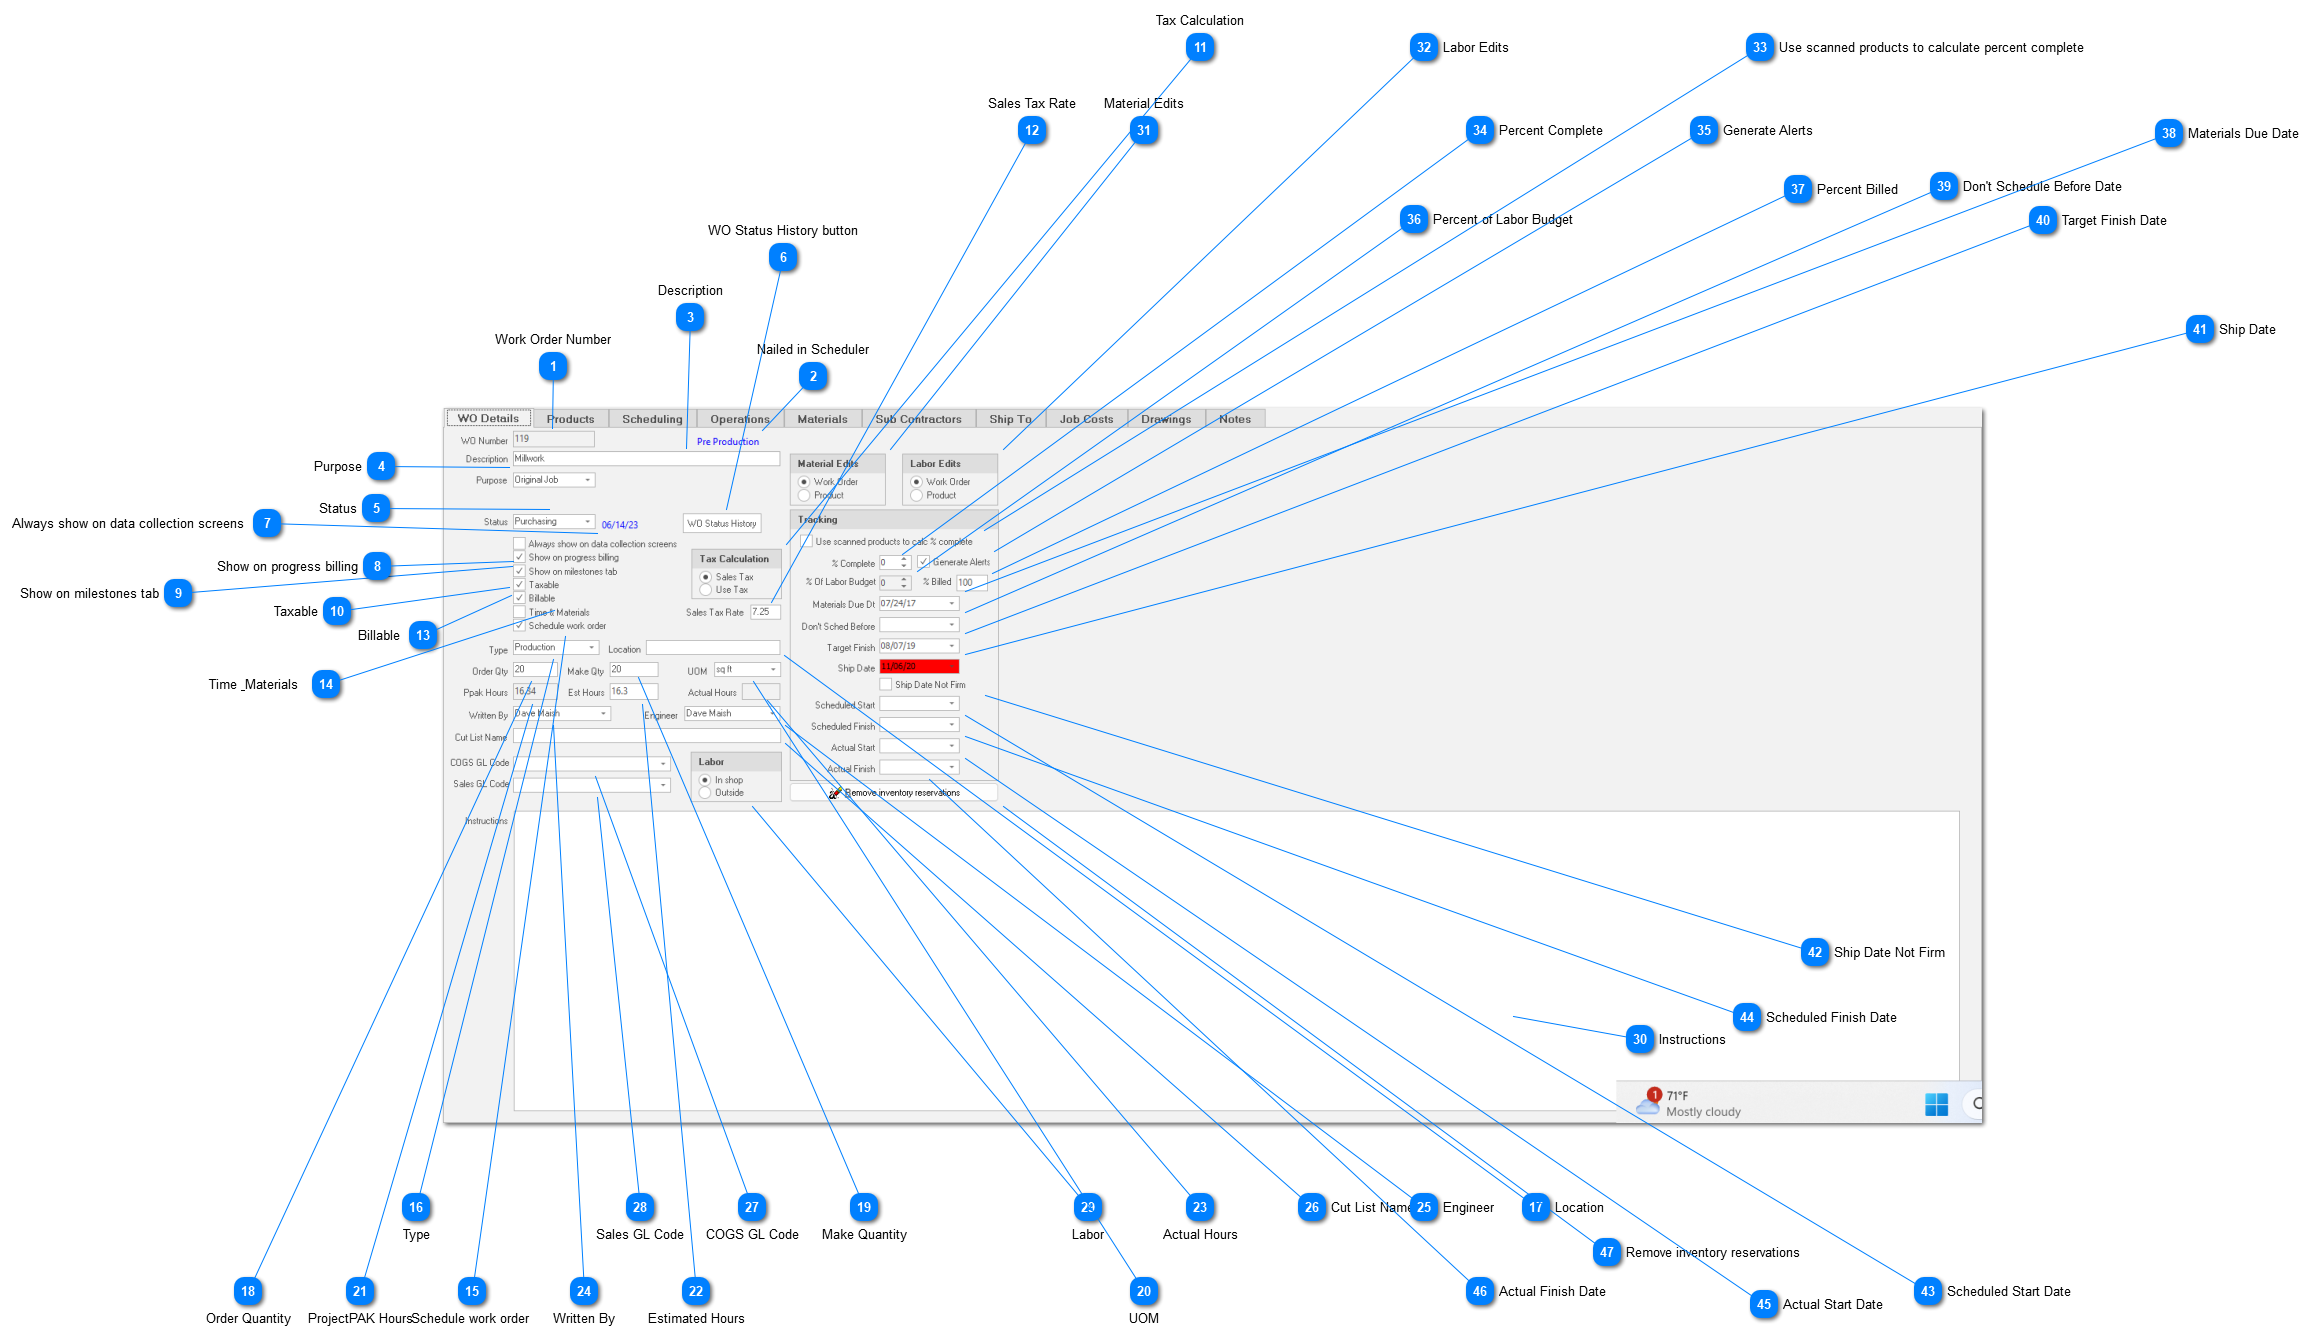


Always show on data collection screensPlace a check in this checkbox if you want the work order to be listed on shop floor data collection workstations, as well as, on the Time Card and Material Card main tabs.
Normally, work order status dictates if a work order is included on a data collection screen. For example, when defining a PC Data Collection Profile, you can indicate which work order status values will be included:
 If you have a work order with a status of let’s say Engineering, and although you don’t usually want ‘Engineering’ work orders listed on shop floor data collection workstations, placing a check in the work order’s checkbox tells ShopPAK to include it in the list of work orders so it can be selected and logged into from a shop floor data collection workstation.
|
Show on progress billingDefaults to how you’ve set up ShopPAK Billing Options. See “Chapter 6 – Job Form”, page 27 for more information. Placing a check in “Show on Progress Billing” tells ShopPAK to automatically include the work order description as a line item on a progress billing application. Furthermore, ShopPAK includes the work order’s sell price as the billing item’s scheduled value.
If work orders match how you define progress billing application line items, placing a check in the appropriate work order “Show on Progress Billing” checkbox saves time. However, if the structure of the job tree doesn’t match how you want to organize your progress billing applications, make sure “Show on Progress Billing” is left blank.
See Progress Billing / Schedule of Values for more information on setting up and generating AIA Progress Billings.
|
Sales Tax RateWork order sales tax rate. This field is pre-populated from the Job Item level ‘Sales Tax Rate’, however, you can change it as needed at the work order level. This may be necessary in case different work orders have different ‘Ship To’ addresses and are subject to different taxing authorities with different rates. Changing the sales tax rate automatically recalculates sales tax amount on the work order’s “Job Cost” sub tab.
|
BillableIndicates whether or not the work order is ‘billable’. If a work order has labor or material cost assigned to it and it is ‘billable’, then the costs are considered when generating the “Work In Process” (WIP) or “Cost of Goods Sold” (COGS) reports. Costs are included on the WIP report if the work order didn’t have any billing activity during the report’s date range. If a work order is not considered billable, ShopPAK excludes it from the WIP report even though it has material or labor expenses applied to it. Note: Rework Work Orders are not billable. ShopPAK prevents you from placing a check into the Billable checkbox.
|
Time & MaterialsIndicates whether or not the work order is considered to be a ‘Time and Material’ oriented work order. A ‘Time and Material’ work order gives you the ability to capture actual expenses associated with the work order’s scope of work. Normally, this is something that happens after the original job was awarded, and thus, there won’t be any ProjectPAK estimated hours or dollars available for job cost variance comparisons. (Since estimated values will always be zero, actual expenses tend to ‘create’ artificial variances).
If the ‘Time and Material’ variance skews the regular job cost variance reports and makes the job look worse than it actually is (actual costs exceed estimated costs), ShopPAK allows you a facility to negate any variance caused by ‘Time and Material’ work orders.
1. Mark a work order as being a ‘Time and Material’ work order by placing a check in the ‘Time and Material’ checkbox.
2. On the work order “Operations” sub tab, enter the actual hours that have accumulated against a particular labor operation into the “Estimated Hours” cell, as well as, enter an appropriate hourly labor rate into “Estimated Unit Cost”.
3. Since the ‘Time and Material’ checkbox is checked, ShopPAK automatically fills in the protected ProjectPAK estimated hours and unit cost cells with the estimated values you enter.
4. Do the same thing on the work order “Materials” sub tab, entering actual material quantity and cost into the ‘Qty’ and ‘Unit Cost’ cells.
5. Again, ShopPAK populates the corresponding protected ProjectPAK cells with the values you’ve entered.
6. Since the ProjectPAK ‘budgeted’ hours and costs now match the ‘actual’ hours and cost, there is no adverse affect on the job cost reports.
|
Order QuantityNumber of work order product items the customer has ordered. Whether this is a required field or not, depends on how you’ve set up ‘Sell Price & Percent Complete’ maintenance. If you are maintaining sell price at the work order level, then yes, this becomes a required field. The total sell price for the work order is calculated by multiplying “Order Qty” times “Unit Price” (located on the work order’s “Job Costs” sub tab). If several products are grouped together on one work order, then “Order Qty” is usually 1. On the other hand, if the work order addresses one product type, then you can set “Order Qty” to the product occurrences you plan on making.
|
Estimated HoursAlthough we allow users to enter ShopPAK estimated hours into this field, most users let ShopPAK estimated hours ‘bubble up’ from changes made to the work order’s “Operations” and/or “Scheduling” sub tabs.
‘Estimated Hours’ are usually the same as the ProjectPAK budgeted hours, however, we allow users to change estimated hours if they feel the ProjectPAK estimated hours are no longer accurate. This is important, since departmental ‘Estimated Hours’ is used by the Scheduler to schedule work. In order to generate an accurate schedule, if post estimate, you discover that the estimated hours are no longer accurate, you need to change them. We recommend making changes to the “Operations” sub tab since ShopPAK automatically bubbles up changes and populates the “Scheduling” sub tab and the work order “Details” tab.
|
COGS GL CodeDrives the accounting oriented Cost of Goods Sold (COGS) report and the Work In Process (WIP) report. These reports are broken down into product type cost categories as defined by the COGS GL codes. For many customers, they like to use their actual COGS expense codes. However, you can define appropriate GL Account Codes any way you like to organize the COGS and WIP reports.
Choose the best GL Account Code from the user defined list of choices. Note: GL Account Codes are defined in ProjectPAK under the Define | GL Accounts menu item. For more information on defining GL Account codes, see ShopPAK List Values.
|
Sales GL CodeIf you mark a work order as being included on Progress Billing (e.g. put a check in the “Show on Progress Billing” checkbox), we recommend determining the correct offsetting sales / revenue GL Account code. When you create a new AIA Progress Billing, the work order’s sales GL Account code automatically flows on to the application billing item, along with the work order’s description and value.
If you want to export invoices to your accounting package, you need to supply the correct GL Account codes so the accounting packages can properly import ShopPAK transactions.
|
Labor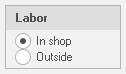 Two predefined values exist: “In Shop” and “Outside”. Indicates if this is an ‘internal’ work order, in other words, you’ll use your own employees to fabricate product within your shop, or this work order is being ‘contracted out’ to a sub-contractor.
| ||

Material Edits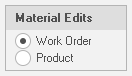 Automatically populated from your default “Material Edits” option setting in the “ShopPAK Options” dialog box. Tells ShopPAK if the work order’s materials will be maintained at the product level or the work order level.
Work Order Level
Choose “Work Order” when you want to identify bill of materials (BOMs) needed for ALL products listed on the work order. This is the setting most of our customers choose. Since a work order is a related group of work that is going to be engineered, purchased, released, tracked, and shipped as a batch, it makes sense to identify material needs at the work order level. The only problem is when the product characteristics, quantity, or mix changes after the estimate has been converted and/or engineering has already updated material quantities. This is where the other choice -> “Product Level” makes more sense.
If you choose to maintain materials at the work order level, ShopPAK prevents you from making changes to material at the product level.
Product Level
Choose “Product Level” when you want to identify bill of materials (BOMs) for each product listed on the work order. This gives you much more control than working at the work order level since you can deal with the specific materials needed for a particular product. The downside is this approach creates more work for your material detailers / engineers since they have to define and maintain material needs for EVERY PRODUCT UNDER THE WORK ORDER.
ShopPAK automatically keeps the work order level synchronized with changes at the product level. We still manage, track, and feed PO Builder from the work order “Materials” sub tab, and thus, ShopPAK has to keep it in sync with product level changes. This includes deleting products and changing product quantity.
If you choose to maintain materials at the product level, ShopPAK prevents you from making changes at the work order level.
|
Labor Edits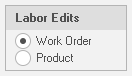 Automatically populated from your default “Labor Edits” option setting in the “ShopPAK Options” dialog box. Tells ShopPAK if the work order’s labor operations will be maintained at the product level or the work order level.
Work Order Level
Choose “Work Order” when you want to identify labor operations needed to build ALL products listed on the work order. This is the setting most of our customers choose. Since a work order is a related group of work that is going to be engineered, purchased, released, tracked, and shipped as a batch, it makes good sense to identify labor routings and estimated time at the work order level. The only problem is when the product characteristics, quantity, or mix changes after the estimate has been converted and/or engineering has already updated estimated labor hours. This is where the other choice -> “Product Level” makes more sense.
If you choose to maintain labor at the work order level, ShopPAK prevents you from making changes at the product level.
Product Level
Choose “Product Level” when you want to identify the labor required to build one product listed under the work order. This gives you much more control than working at the work order level since you can deal with the specific labor hours and routings needed to produce a particular product. The downside is this approach creates more work for your project managers since they have to determine estimated labor for EVERY PRODUCT UNDER THE WORK ORDER.
ShopPAK automatically keeps the work order “Scheduling” and “Operations” sub tabs in sync with changes at the product level. This includes deleting products and changing product quantity.
If you choose to maintain labor at the product level, ShopPAK prevents you from making changes to the “Scheduling” and “Operations” sub tab grids.
|
Percent CompleteUser entered percent complete. If you maintain percent complete at the work order level, ShopPAK automatically ‘bubbles up’ the percent complete to the Job Item and Job levels based on the work order’s percentage of sell price as compared with the overall Job Item and Job sell price.
“Percent Complete” is a very important tracking percentage. It depicts how much of the work order has been finished, and consequently, how much is left before it is completed. “Percent Complete”, by its very nature, is highly subjective. The project manager must gather and interpret a lot of information in order to enter a value that approximates where the work order is at.
Although “% of Budget” and “Percent Complete” are related, they won’t necessarily have the same value. Sometimes you’ll be ahead of schedule, and sometimes you’ll be behind. For example, say your actual labor hours thus far are 70% of the budgeted labor hours, but by your best reckoning, you’re only 50% complete. This work order is in trouble and needs your attention.
|
Percent of Labor BudgetShopPAK automatically calculates percent of labor budget at the work order level. Depending on how you’ve set up your ShopPAK options, ShopPAK calculates percent of labor budget either by dividing actual labor hours by estimated labor hours, or dividing actual labor cost by estimated labor cost. This is a great metric because it is automatic, and it gives project managers a good sense as to where they’re at relative to estimated labor cost or hours.
|
Percent BilledShopPAK automatically updates this percentage based on the amount of money billed (including both progress billings and regular invoicing) relative to the work order’s sell price.
If you need to override percent billed and GL Account Codes after billing has started, make sure the ShopPAK administrator gives you this security privilege via the ShopPAK menu item
Define | Security.
|
Materials Due DateOverall material due date for the work order. This date indicates when material needs to be delivered in order to make the scheduled ship date. When a user enters a material due date at the work order level, ShopPAK automatically fills the “Materials” sub tab “Material Due Dates” with the same date, unless the user had previously typed a specific material due date into the “material due date” cell.
|
Target Finish DateOverall target finish date for the work order. This date indicates when the work order needs to be finished before it is considered late. ‘Target Finish Date’ is primarily used by the ShopPAK Scheduler as it determines if a scheduled finish date is ‘late’ or ‘on time’. If the ‘Target Finish Date’ is earlier or equal to scheduled finish date, the work order is considered to be on time. However, if the ‘Target Finish Date’ is later than the scheduled finish date, the work order is considered ‘late’ and is marked accordingly.
|
Ship DateDate the work order will ship. ShopPAK automatically highlights ship date to be on time, late, in jeopardy of being late, etc. based on your date tracking color choices located via the Define | Date Tracking Colors menu item. We cover setting up date tracking colors in the milestone section in Milestones.
|
Scheduled Start DateDate the work order is scheduled to begin. ShopPAK automatically highlights scheduled start date to be on time, late, in jeopardy of being late, etc. based on your date tracking color choices located via the Define | Date Tracking Colors menu item. We cover setting up date tracking colors in the milestone section in Milestones.
|
Scheduled Finish Date Date the work order is scheduled to finish. ShopPAK automatically highlights scheduled finish date to be on time, late, in jeopardy of being late, etc. based on your date tracking color choices located via the Define | Date Tracking Colors menu item. We cover setting up date tracking colors in the milestone section in Milestones.
|
Remove inventory reservationsRemoves any unused reservations for the work order after the work order is completed. Refer to Job Details for instructions on removing inventory reservations.
|
Custom Fields 
Click the “Custom Fields” button to browse and/or edit work order custom field information. This displays the “Work Order Custom Fields” dialog box. This dialog box contains ShopPAK and ProjectPAK custom fields. These additional, user-defined fields, can be printed on the work order. ShopPAK gives you 10 customizable fields, along with 21 ProjectPAK customizable fields. If you convert a ProjectPAK estimate into a ShopPAK job, ProjectPAK custom field information is automatically brought over to ShopPAK.
Use these additional fields to enter company-specific information not found on the standard work order form.
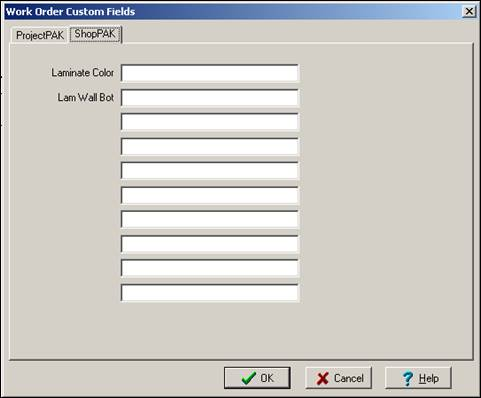
NOTE: See “Chapter 4 - Setup and Options” page 40 for instructions on creating ShopPAK work order custom field names.
|
If your screen size and resolution is large enough, ShopPAK displays the work order custom fields towards the right of the Details sub tab so you don't need to click the Custom Fields button to see them.