
Setup
Before you can use the integrated export approach, you have to set up both ShopPAK and QuickBooks accordingly.
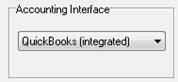
In ShopPAK Options ‘Accounting’ tab, choose QuickBooks (integrated) as your accounting interface target:
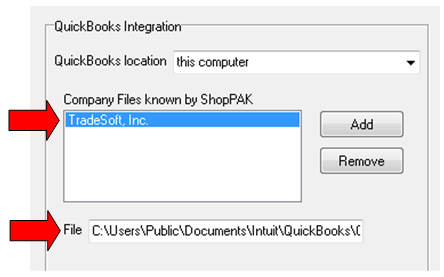
This displays the QuickBooks Integration setup area:
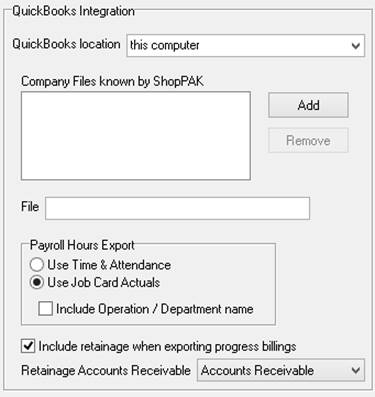
QuickBooks Location
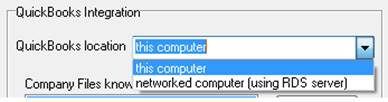
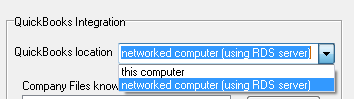
There are two ways to use the Integrated Quickbooks Interface: Local or Remote,
Local
Local means that the QuickBooks’ database resides on the same machine as the ShopPAK client. Choose ‘this computer’ if you want to use the local interface.
Remote
Remote means that the QuickBooks’ database is located on another PC, and ShopPAK will need to connect to the database across the network. Choose ‘networked computer (using RDS server)’ to connect remotely.
Local Method
If you choose the local method, make sure QuickBooks is open and running on the same PC that has ShopPAK. Choose ‘this computer’ and click the Add button.
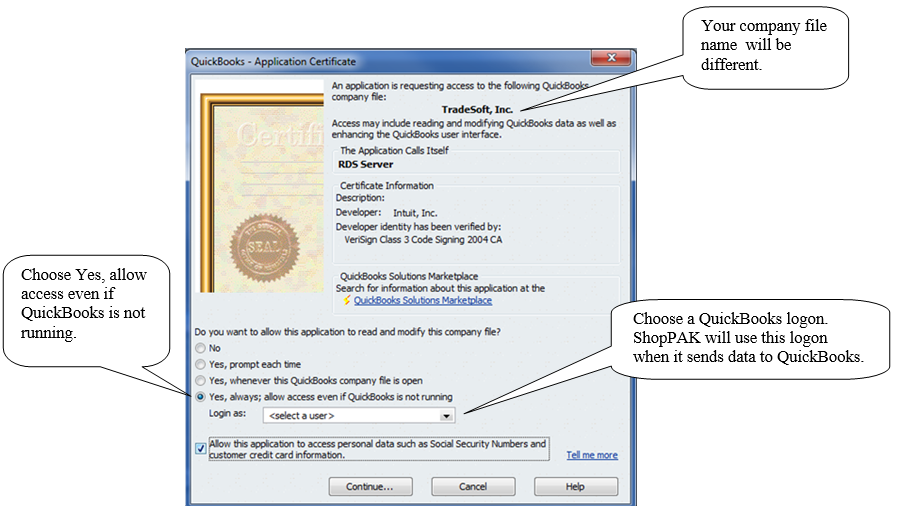
You will receive a prompt from Quickbooks.
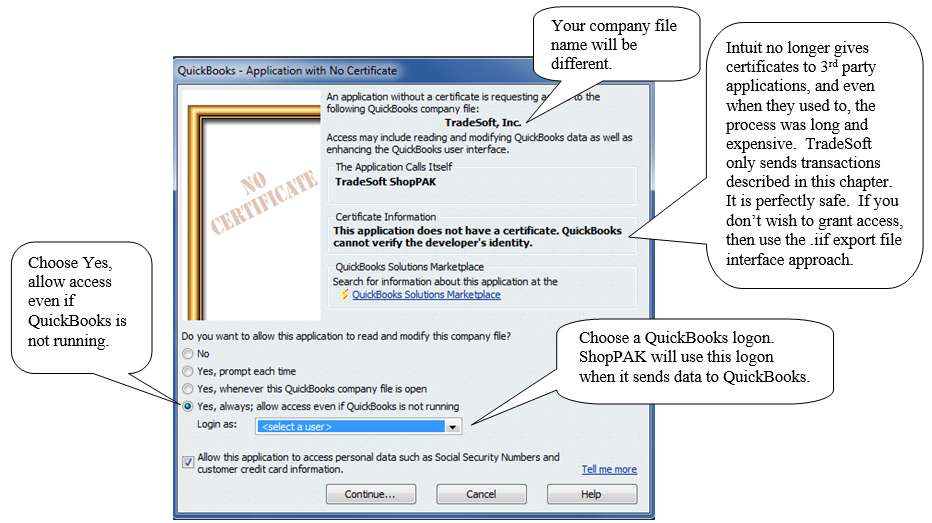
If you plan on sending payroll hours to QuickBooks, we recommend you place a check in 'Allow this application to access personal data...'.
Note: ShopPAK will not access personal data such as social security or credit cards, but enabling this option allows ShopPAK to make sure a QuickBooks employee is set up properly to accept payroll hours (and fix any problems found prior to exporting data). If you choose not to allow personal data access, there will just be an error notification during the export if a problem is encountered.
|
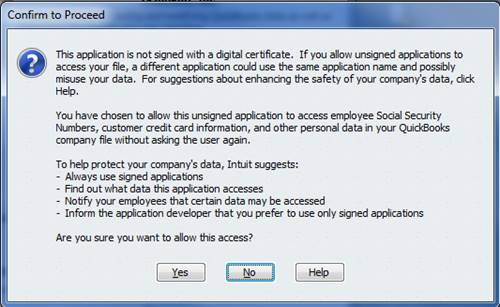
Click Continue. A confirmation window appears.

Click Yes. Focus returns to ShopPAK. You should see your QuickBooks company file added along with its file location.
Note: Once you’ve set up QuickBooks to accept data from ShopPAK, you don’t have to open QuickBooks when sending data to it. ShopPAK will be able to access the QuickBooks database and seamlessly send information to it via the ShopPAK export routines previously covered in this chapter.
|
Remote Method
If QuickBooks (and the QuickBooks’ database) is on another PC, you need to install and set up the Remote Data Sharing (RDS) Server before you can identify the QuickBooks company file.
RDS Server Install and Setup
On the machine where QuickBooks is installed, you need to run the RDS6ServerInstaller.exe. This file is included in the ShopPAK install, and thus, will be located on any PC where you’ve installed ShopPAK.
The file will be found in your ShopPAK installation folder ->
C:\Program Files (x86)\TradeSoft\ProjectPAK\RDS Installs
Or if you have a 32 bit version of Windows, it will be found in ->
C:\Program Files\TradeSoft\ProjectPAK\RDS Installs
1. Copy RDS6ServerInstaller.exe to the QuickBooks PC.
2. Double click the file to start the installation. Follow the Installer instructions. Simply accept all the defaults by clicking the ‘Next’ or ‘Install’ button when prompted.
3. When you finish installing the RDS Server, start QuickBooks.
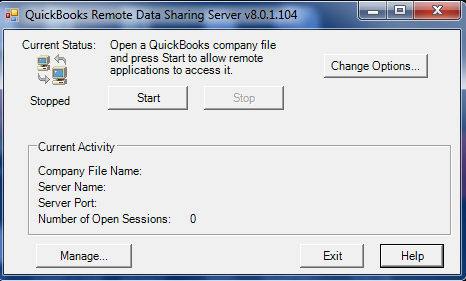
4. Launch the RDS Server by selecting Start | All Programs | QuickBooks | Remote Data Sharing Server from the Windows Start button.
5. Click the Manage button. This displays the Manager window.
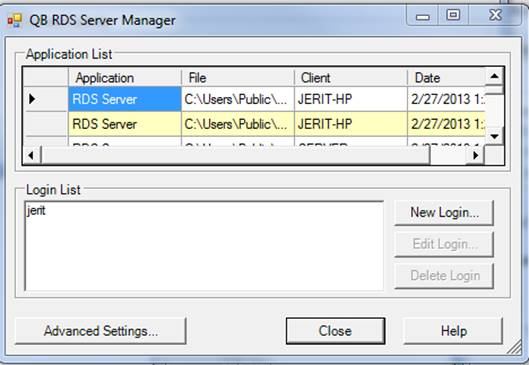
6. Click the ‘New Login’ button and create a logon that ShopPAK will use when sending data to QuickBooks.
7. Once you’ve created the ShopPAK remote logon, click the Close button.
8. You are now ready to start the RDS Server by clicking the Start button.
9. The first time you start the RDS server, focus will shift to QuickBooks. QuickBooks displays the following dialog box:
If you plan on sending payroll hours to QuickBooks, we recommend placing a check in 'Allow this application to access personal data...'.
Note: ShopPAK will not access personal data such as social security or credit cards, but enabling this option allows ShopPAK to make sure a QuickBooks employee is set up properly to accept payroll hours (and fix any problems found prior to exporting data). If you choose not to allow personal data access, there will just be an error notification during the export if a problem is encountered.
|
Click Continue. A confirmation window appears. Click the Yes button.
RDS Client Install and Setup
The next step is installing the RDS Client application (RDS6ClientInstaller.exe ) on any ShopPAK PC that needs to send information to QuickBooks. The RDS Client works in tandem with ShopPAK. When ShopPAK sends information to QuickBooks, data is actually communicated via the RDS Client across your network to the RDS Server………. and then on to QuickBooks.
The RDS client file will be found in your ShopPAK installation folder ->
C:\Program Files (x86)\TradeSoft\ProjectPAK\RDS Installs
Or if you have a 32 bit version of Windows, it will be found in ->
C:\Program Files\TradeSoft\ProjectPAK\RDS Installs
1. Find RDS6ClientInstaller.exe in your ShopPAK installation folder.
2. Double click RDS6ClientInstaller.exe to start the installation. Follow the Installer instructions. Accept all the defaults by clicking the ‘Next’ or ‘Install’ button when prompted.
3. When you finish installing the RDS Client, launch the RDS Client by selecting Start | All Programs | QuickBooks | Configure Remote Data Sharing Client from the Windows Start button.
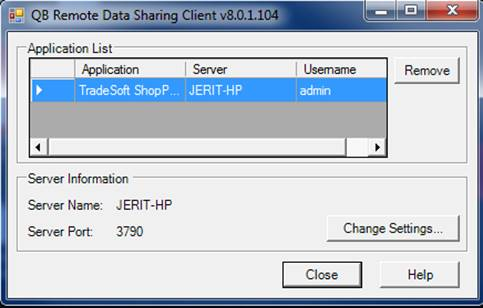
Typically, all you have to do is start the RSD client on the ShopPAK PC. It automatically fnds and connects to the running RDS Server. However, if you have more than one QuickBooks company file being monitored by multiple RDS Servers, then use the ‘Change Settings’ button to select the RDS Server you want to send data through.
4. Once the RDS Client is running, you need to add the QuickBooks Company File to ShopPAK. This is done in the ShopPAK Options dialog box. ( Define | ShopPAK Options | Accounting tab). Select 'networked computer (using RDS server)' from the ‘QuickBooks location’ drop down combo box.
5. Click the ‘Add’ button. ShopPAK displays the following message.
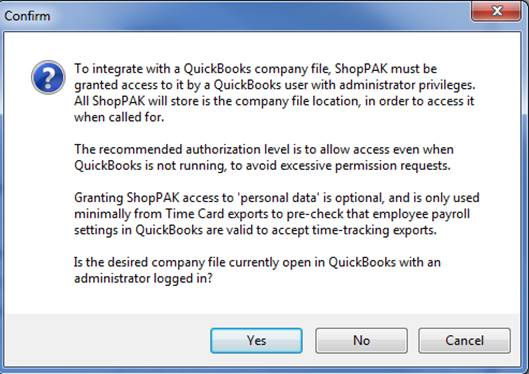
Read through requirements for adding a QuickBooks company to ShopPAK. If you can proceed, click Yes. (This only has to be done once). You will then receive a prompt from the RDS client.
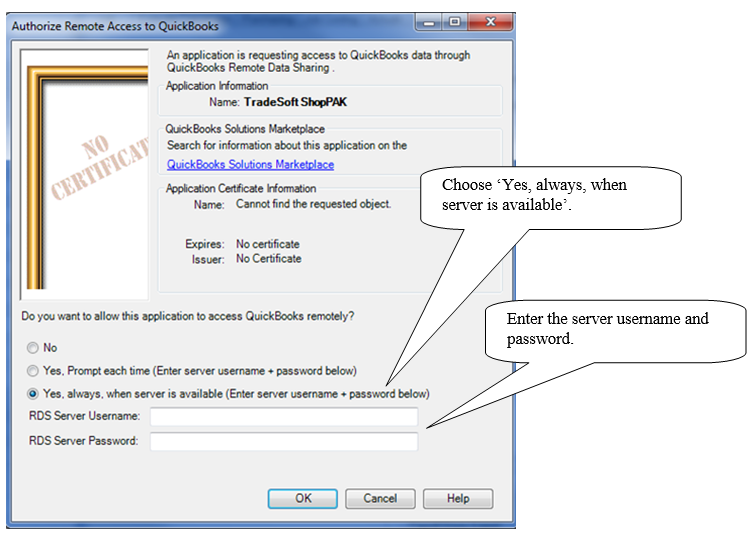
6. Select -> 'Yes, always when server is available'.
7. Enter the RDS Server Username and Password you created earlier. Click OK.
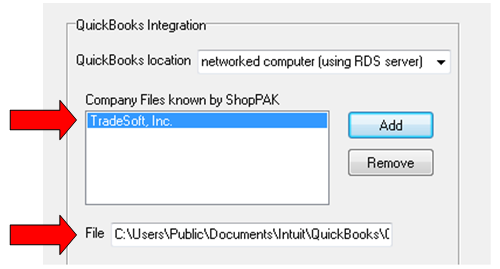
8. When focus returns to ShopPAK, you should see the QuickBooks company file name and path.
Tip: When sending information to QuickBooks via the RDS Client and Server, the RDS Server must be running on the remote machine that you installed it on. If the RDS Server isn't running, it won't be able to connect to QuickBooks and successfully complete the export. If you would like to set up the RDS Server to start up automatically on the QuickBooks’ PC, we recommend moving the RDS Server Start Menu shortcut into the Startup folder (also located in your Start Menu) .
|