
Packing Lists
Packing List Document Layout
ShopPAK generates packing slips that contain information for the currently selected shipper. What gets printed on the ship ticket depends on the Packing Slip printing instructions.
Note: See “Setup and Options” for instructions on setting Packing Slip default document printing options.
|
If you don’t override the default Packing Slip printing instructions, the generated Packing Slip order will print according to the default instructions. This will be the situation most of the time.
However, if you need to override the printing instructions for a particular Packing Slip:
1. Find the shipper you want to print in the “Ship Ticket” grid. Select it by clicking it with your mouse. The ship ticket information displays on the Ship Ticket form.
2. Click the “Override Document Print Instructions” icon  from the speed bar. This displays the “Packing Slip Printing Options” dialog box.
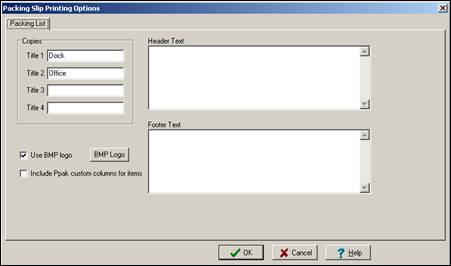
Change the printing instructions as needed for this packing slip and click OK.
Note: ShopPAK remembers printing instruction changes for a Packing Slip. If you reprint the Packing Slip, you don’t need to modify the default printing instructions again.
|
Generating a Packing Slip
You can preview, print, and email packing slips. Find the Ship Ticket you want to preview, email, or print in the “Ship Ticket” grid. Select it by clicking it with your mouse. The ship ticket information displays on the Ship Ticket form.
Previewing a Packing Slip
1. Select File | Preview or click the preview icon  from the speed bar.
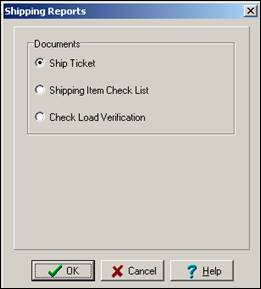
2. This displays the “Shipping Reports” dialog box. Select ‘Ship Ticket’ and click OK.
3. This displays the “Report Setup” dialog box.

Use this dialog box to print a paper copy of the Packing Slip, change the number of copies, or display the Print Setup dialog box.
3. Click the “OK” button to preview the ship ticket.
TIP: You can print the document from the preview window if it looks good.
|
4. Close the “Preview” window.
Note: You’ll see the “Report Setup” dialog box appear more than once if you are generating multiple copies of a Packing Slip. Hit cancel to bypass previewing a document copy.
|
Printing a Packing Slip
1. Select File | Print from the menu or click the print icon  from the speed bar.
2. This sends the Packing Slip directly to your default printer. All copies of the Packing Slip are printed.
Emailing a Packing Slip
1. There are two Ship Ticket popup menu selections for email a packing slip:
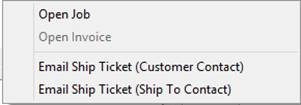
Click Email Ship Ticket (Customer Contact) if you want to send the packing slip to the customer address. Click Email Ship Ticket (Ship To Contact) if you want to send the packing slip to the ship to address.
2. Provided you have an email address for the selected customer's ProjectPAK Contact record or the ProjectPAK Company record, ShopPAK automatically generates a PDF of the packing slip, launches your email client program, fills in the email address and subject of the email, and attaches the generated packing slip PDF to the email.
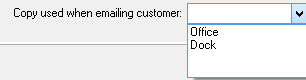
Since you can generate up to 4 distinct layouts of a packing slip, you have to identify which packing slip copy you want ShopPAK to generate as a PDF and attach to the email. This is done via the Packing List tab of the Document Printing Options dialog box. Select the 'shipping' copy prior to emailing packing slips.
If you attempt to email a packing slip but there isn't a contact or vendor email back on the corresponding ProjectPAK business or contact record, you'll receive the following warning message:
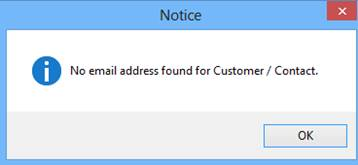
Bring up ProjectPAK and supply an email address. You'll then be able to email the packing slip.