
Product Labels
The ShopPAK Shop Floor Data Collection setup dialog provides two options for printing 'on demand' product labels:

Scan existing product label and print 2nd label
Use this option when you have a specific area to clean and wrap finished products. There will already be a bar coded label attached to the product. Operator scans the product label and an identical label is printed. Use this label on the outside of the wrapped product.
Select work order and list products
Use this option when you want to print one or more product labels for a particular work order.
To print a product label, press the Label button:
If you've configured label printing to first select a work order, the Work Order screen displays. Select the work order that has the product you want to print labels for… then click Next button.
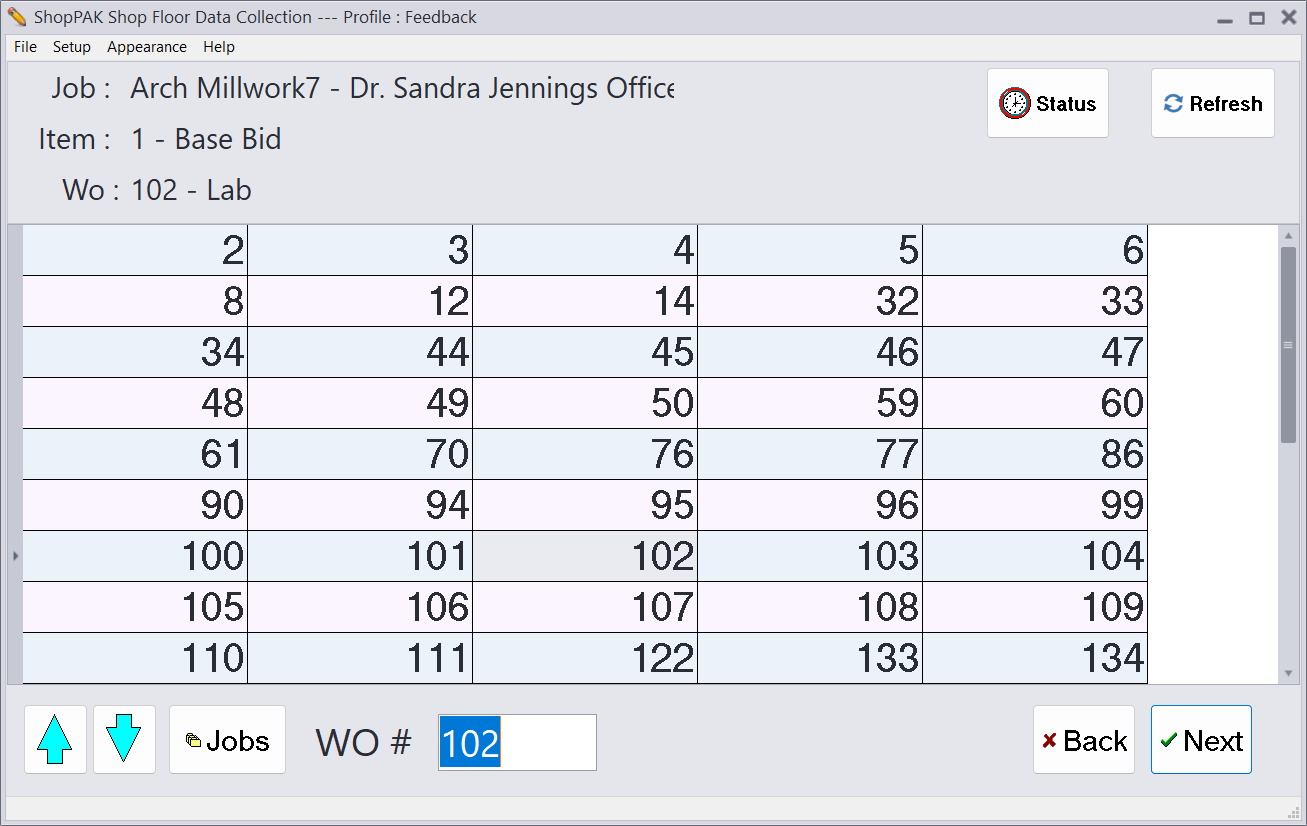
All of the work order’s products will be listed.
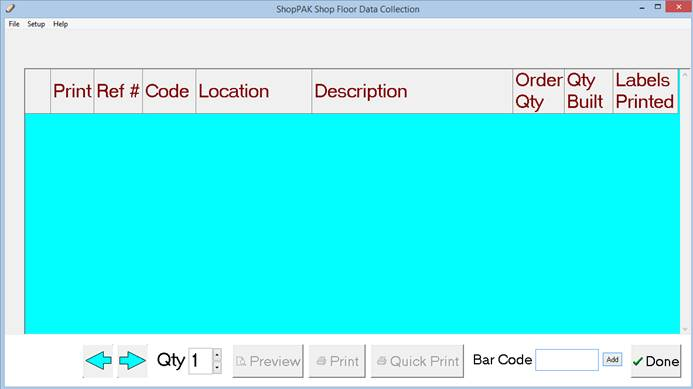
If you selected the option of scanning a product label in order to generate a duplicate product label, the product list will be blank when first displayed. You'll need to scan a product's bar coded label to bring it into the grid. From there a second label can be printed.
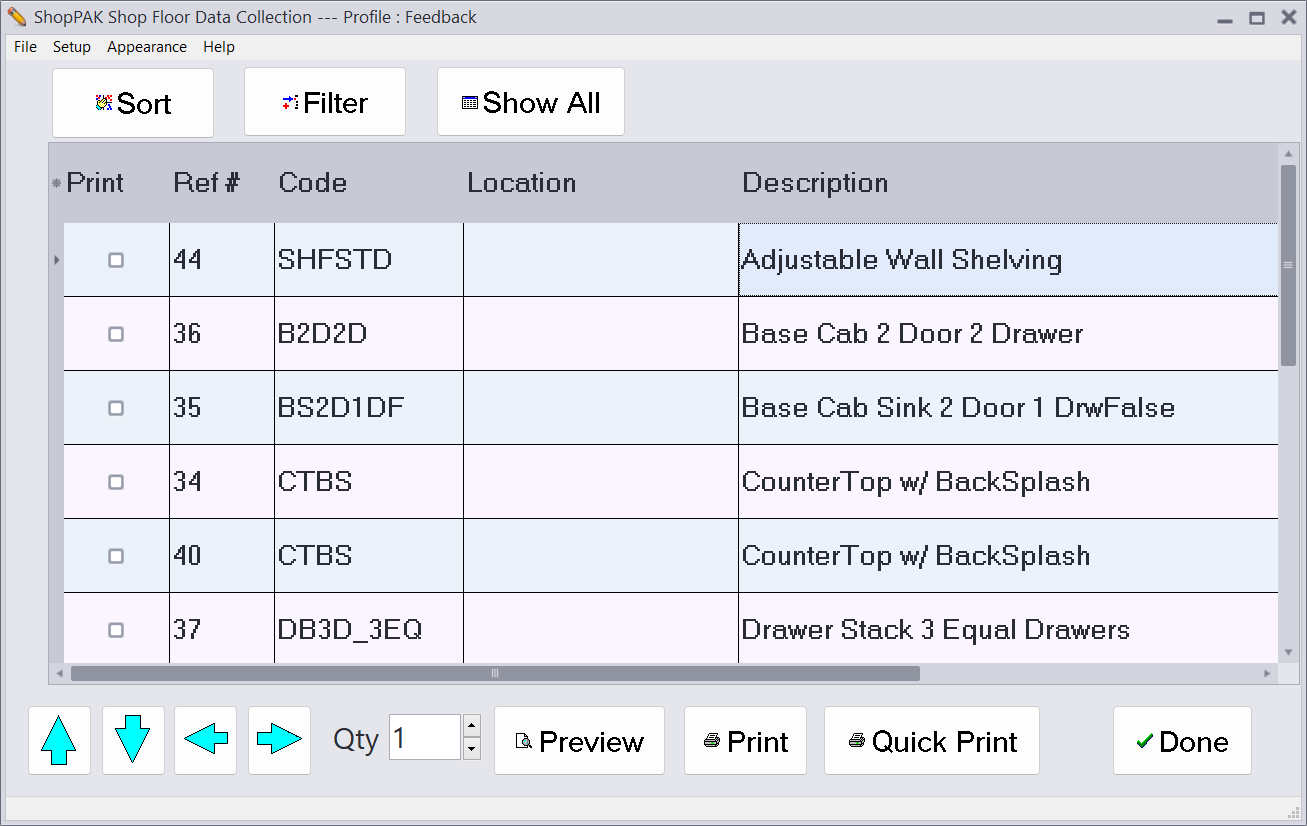
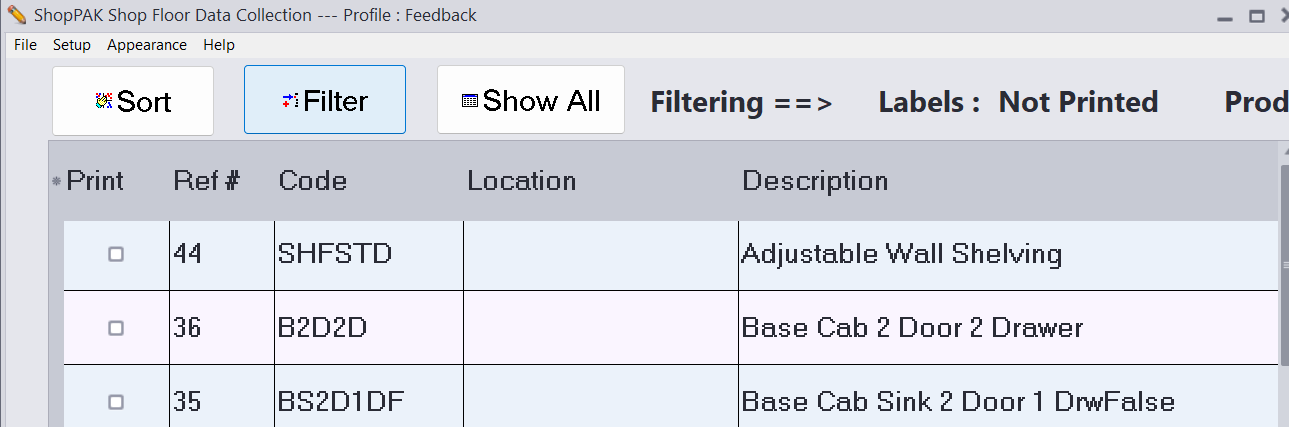
When displaying a list of Work Order products, you can filter and sort the list to make it easier to find the products you want to generate labels for.
Filtering
Press the 'Filter' button to bring up filtering options:
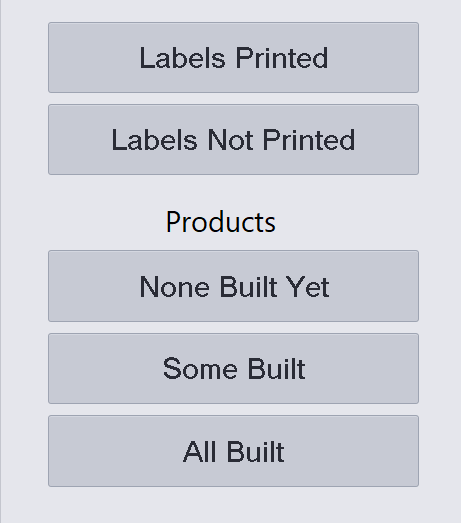
You can filter by whether or not labels have been generated for a product, and you can filter by whether or not a product has been fully built, not built, or partially built.
Sorting
Press the 'Sort' button to sort the list of products. You can order the grid by Product Code, Reference Number, Location, or Product Description.
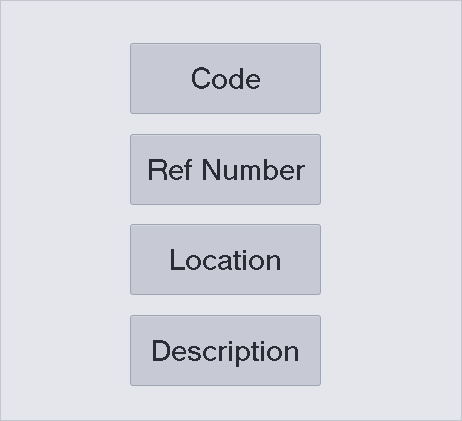
Press a button and the grid is sorted accordingly.
Printing Labels
Select the label(s) you want to print by placing a check in the label's Print checkbox. For example, if you wanted to print labels for product's number #34, #37, and #38, place a check into the corresponding 'Print' cells….

Then press the Preview, Print, or Quick Print Buttons…

The default is printing one label, however, you can use the Quantity control to increase the number of labels.
The Quick Print button becomes enabled after you've clicked Preview or Print for the first time. Quick Print assumes that you want to print the next label using the previous label's label stock and printer choices.
Once you’ve generated a product label, click the “Done” button to return to the Employee List screen.
Mark as Built

A very powerful and useful label printing setup feature is combining marking a product as build when printing a label. For each label printed, the Kiosk increments product 'scan count'. This eliminates having to go to the 'Product Built' screen to explicitly mark a product as 'built' by scanning it. Take care of two steps with one action.