
Offsetting GL Expense Account Code
Before you can export reconciled AP invoices, each PO Item on the ShopPAK purchase order needs a GL expense code. Even if one PO Item is missing an offsetting GL expense code, ShopPAK displays an error message and halts the export process.

Earlier in this chapter we recommended that you update ProjectPAK library items with corresponding GL expense codes. Since purchasing relies heavily on ProjectPAK library items, setting up GL expense codes ahead of time ensures that PO Item GL Account codes will be automatically populated for you and they’ll always be accurate.
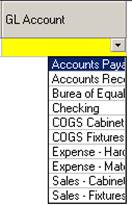
If you need to add a GL expense code manually, simply click your mouse on the pick list down arrow and choose the correct the GL expense code.
If you have a number of rows to update, and they all need the same GL expense code, do the following:
1. Select the rows you want to update by clicking their row buttons (located at the far left hand side of each row). Holding down your left mouse button, you can drag your mouse across the buttons to select them. If selecting non-contiguous rows, hold down your CTRL key so you don’t lose previously selected rows.
2. Right mouse click the PO Item grid and select “Update GL Account Code” from the pop up menu. This displays the “GL Account Code” dialog box.
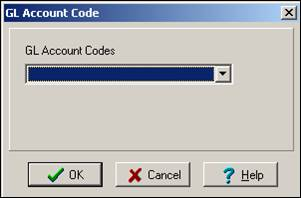
3. Choose the GL expense code from the pick list and click OK. ShopPAK will copy the GL account to all selected rows.
Note: If you forget to fill in a PO Item’s GL expense code at purchasing time, you can open the PO and fill in PO Item GL expense codes after the PO has been received and/or reconciled. This is one of the few fields that isn’t ‘protected’ after the PO is received.
|