
Displaying the Billing Tab
Make sure the “Billing” tab is active by clicking it with your mouse. All of the actions in this chapter require that the “Billing” tab remains selected, with the exception of initially generating the first-cut regular invoice. This is done on the “Shipping” tab as explained in the next section.
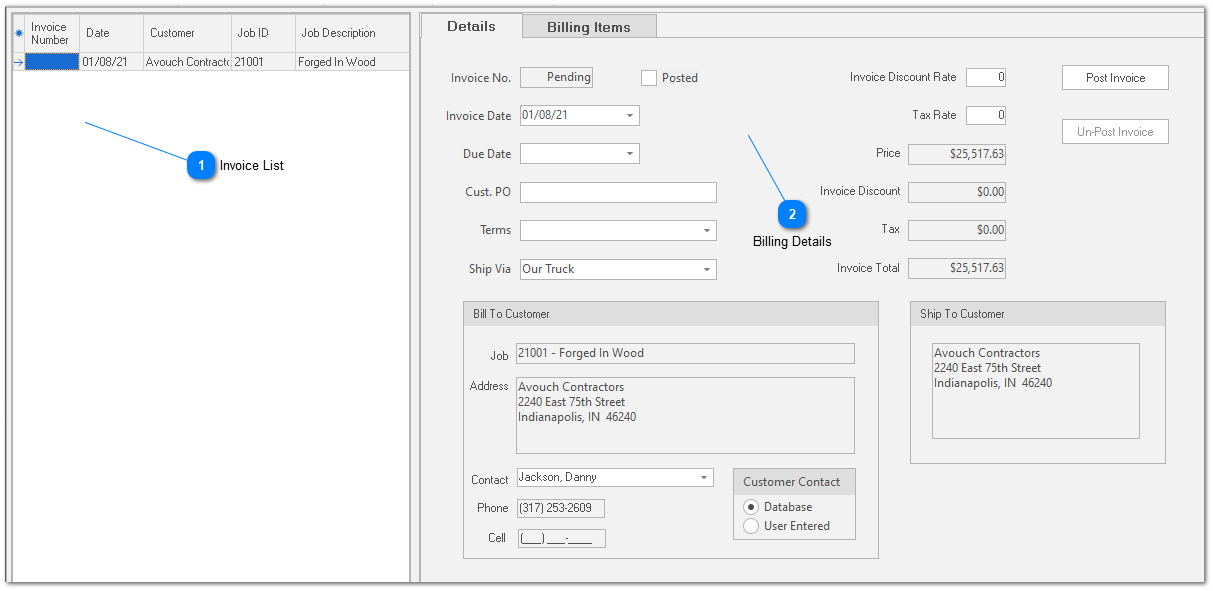

Billing Details Invoice Number
System generated, read only field. When you save a new invoice, ShopPAK assigns the next sequential invoice number. (You can give ShopPAK your starting invoice number. See “Set up and Options”).
Invoice Date
Initially, will have the date that you created the first-cut invoice from the “Shipping” tab. The invoice date can be changed if need be.
Due Date
Free form field to enter in due date.
Customer PO
Free form field to enter in customer PO number.
Terms
Choose applicable billing terms from the pick list.
Ship Via
Mode of shipment. Initially set to the invoice’s corresponding ship ticket’s ‘Ship Via’.
Invoice Discount Rate
Enter the discount percentage you want applied to the entire invoice. If you don’t discount, leave a zero in the field.
Tax Rate
Enter the sales tax percentage if the invoice is subject to sales tax. Each row of the invoice has a ‘Tax’ checkbox. For those items that are taxable, make sure you place a check in the row’s ‘Tax’ checkbox.
Price
Read Only. ShopPAK sums all of the invoice item extended prices and gives you the total.
Invoice Discount
Read Only. When applying a discount to the entire invoice, ShopPAK displays the total dollar amount of the discount.
Tax
Read Only. If some invoice item rows are taxable, ShopPAK displays the total tax amount.
Invoice Total
Read Only. Total invoice amount including sales tax minus any discounts.
Bill To Customer
Initially set to the corresponding ship ticket’s ‘Job’ and ‘Customer’ information.
Ship To Customer
Set to the corresponding ship ticket’s ‘Ship To Address’.
Post / Un-Post Invoice
Click "Post Invoice" to post invoice. Click "Un-Post Invoice" to un-post a posted invoice.
|