
Changing a Work Order Status
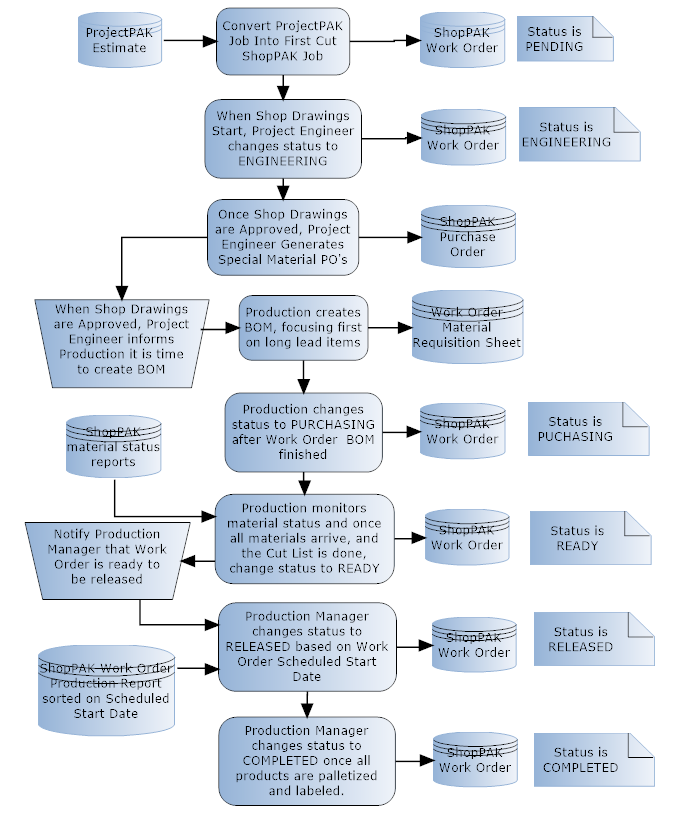
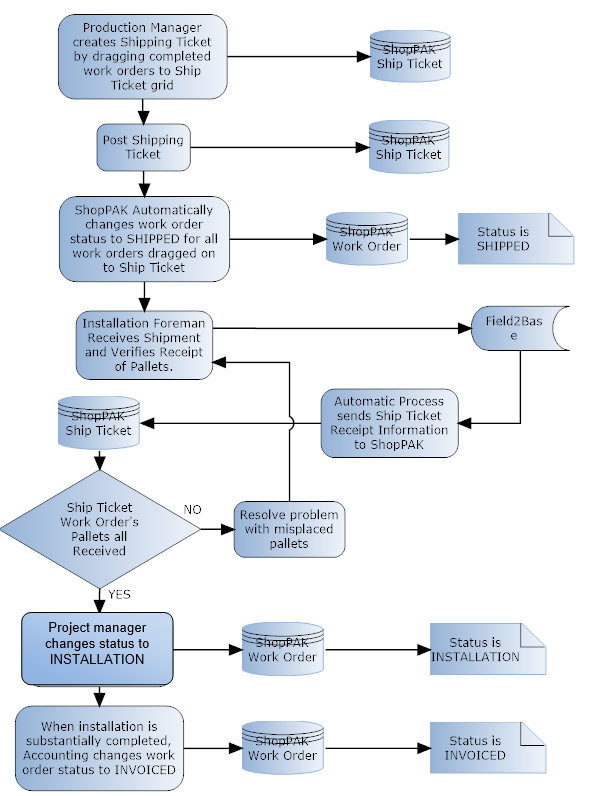
Every new customer should analyze and document their ShopPAK procedures and work flows. One of the most important procedures deals with changing work order status values. In particular, define what each status value means, who changes work order status, when to change work order status, and what are the related steps and consequences when a work order status changes. Following is an example of a ‘Work Order Status Change’ procedure from an actual customer.
1. Select the work order from the tree by clicking it with your left mouse button.
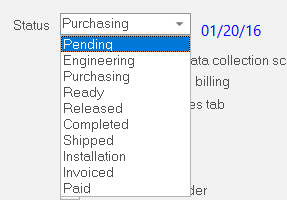
2. Choose the new work order status from the “Status” pick box.
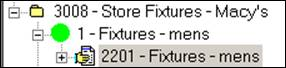
3. ShopPAK immediately updates the work order’s icon in the Job Tree, as well as, the work order’s Job Item icon. In the example below, we changed the status to ‘Released’ from ‘Pending’. The Job Item icon went from a black circle to a green circle. The work order icon changed from a blank sheet to a person handing a finished work order off to production.
If you’ve set up ShopPAK to allow mass update of work order status, you can change status on several work orders at the same time. See "Setup and Options" for details on how to enable mass updating of work order status.
1. Select the Job or Job Item from the Job Tree that you want to change. If you select a Job, all of the work orders under the Job will be changed. If you select a Job Item, all of the work orders under the Job Item will be changed.
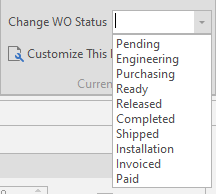
2. Select Tools | Change WO Status from the ShopPAK Menu.
3. Choose the new work order status from the work order status pick box.
4. ShopPAK applies the change to ALL work orders within the selected target, updating job tree icons and work order status accordingly.