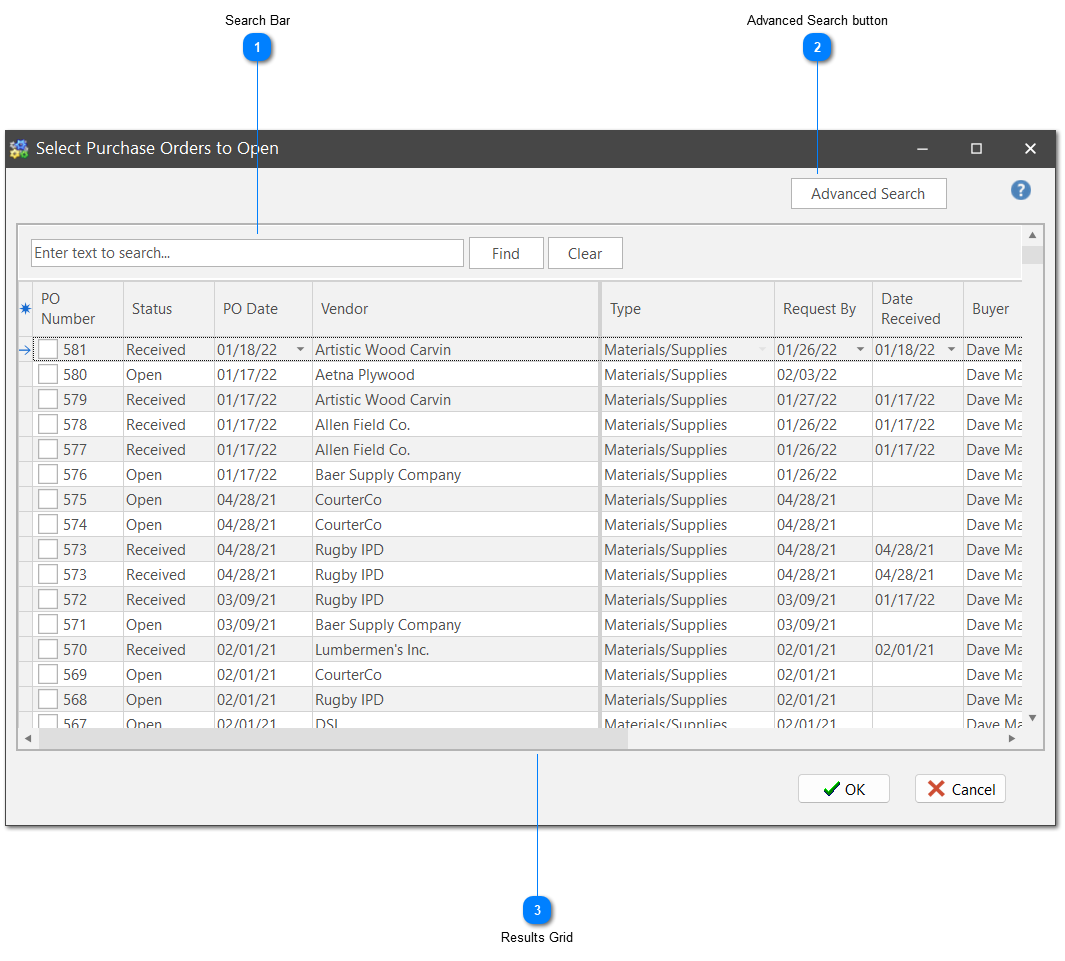
1. Select File | Open from the ShopPAK menu or click the Open Record icon from the speed bar. Note: Clicking the down arrow shows recently opened POs. Selecting a PO from the list opens the PO. Clicking the open folder icon displays the following dialog box:
Search Bar
Type in the "Enter text to search" to key word search a Purchase Order. Click Find to search. Click Clear to remove key word(s).
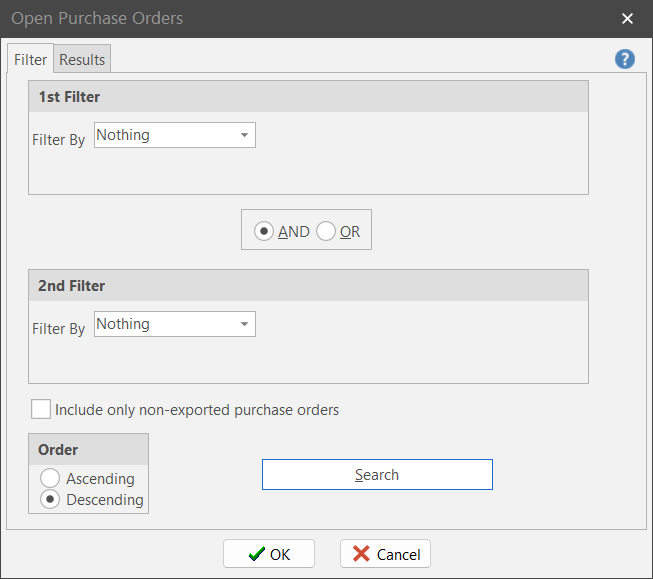
Click on the Advanced Search button to bring you to the search method that was used in ShopPAK 5.3 and older.
Use “Filter One” and/or “Filter Two” to pinpoint the set of POs you want ShopPAK to find. If you use both filters, make sure you select the right matching value. Use “AND” if you want to limit the list of POs returned from the database. Use “OR” if you want to expand the list of POs returned from the database.
Filter
Purpose
Nothing
No filtering. Returns all POs.
Vendor
Filters on a particular vendor.
Status
Filters by PO Status. Choose status from list.
Buyer
Filters on the person that created the PO.
Number
Filters on the PO Number. You must enter the entire number.
Job
Filters by PO Item job assignment.
Job Item
Filters by PO Item job item assignment.
PO Date Range
Filters on the “PO Date” field. This date defaults to the date the PO was created, however, it can be changed by a user.
Over Due
Filters on POs that have not been received by their “Request By Date”.
Requestor
Filters by the requestor of the PO.
Work Order
Filters by a specific work order number. Brings up POs that have a job assignment reference to the work order.
Return to Vendor
Filters by ‘Return to Vendor’ purchase orders.
Inventory Item
Filters by a particular inventory item. Brings up POs that have a PO Item that references the inventory item.
Not Reconciled, Not Closed
Filters on POs that have not been reconciled and not yet closed.
Reconciled, Not Closed
Filters on POs that have been reconciled but not yet closed.
PO Builder PO's
Filters on Pending POs created today.
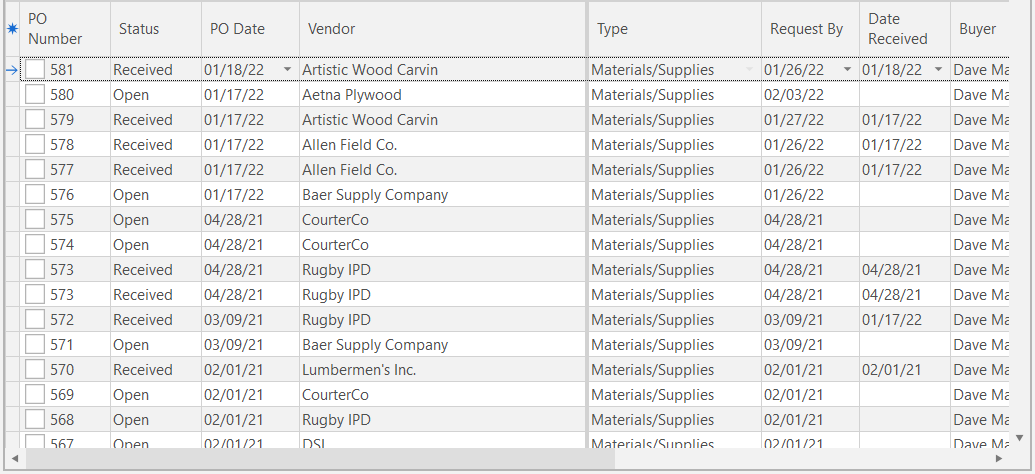
Press “Enter” or click the “Search” button. ShopPAK retrieves the POs that match your filtering criteria, and displays the list on the “Results” tab.
If you want to open ALL of the POs in the list, press “Enter” or click the “OK” button. However, if you want to select just one PO from the list, or some smaller subset of POs, click the row buttons of the PO(s) you wish to open. Press “Enter” or click the “OK” button.
TIP: If you’re selecting several rows by clicking them with your mouse, hold down the control key so previously selected rows remain selected.
The PO(s) you selected display in the PO List. Click the purchase order you want to browse or update. Note: If another user is editing the PO, you will only be able to browse it.
The Results grid initially defaults to all purchase orders and narrows down based on the search criteria entered. To open a PO place a check in the box at the beginning of the row and click the OK button. If you want to open multiple POs, check each box then click the OK button.

 from the speed bar. Note: Clicking the down arrow shows recently opened POs. Selecting a PO from the list opens the PO. Clicking the open folder icon displays the following dialog box: