
Alert Browser
The Alert Browser displays generated alerts. It works as a ‘modeless’ dialog box meaning you can keep it open, and at the same time, still access other ShopPAK forms and windows below it. This is ideal when you want to bounce between the Alert Browser and related records within ShopPAK. The window refreshes alerts every 5 minutes.
To launch the Alert Browser, select Tools | View Generated Alerts from the menu. This displays the Alert Browser window.
If your alert security only allows you to look at your own alerts, the “View Alerts For” drop down list will be disabled as shown below….
However, if your alert security allows you to browse other user alerts as well, the drop down list will be enabled, allowing you to choose another person.
Alert Filters
Several filters are available to help view large numbers of generated alerts. When using filters in tandem, each filter’s search criteria is added together and applied simultaneously. This tends to reduce the number of alerts displayed at one time. Unless you review alerts daily and delete them as you process them, your alert list can grow quite long. Filters are a great tool to help you process alerts. But remember to delete them as you process them.
Alert Category & Sub Category
Displays alerts that have corresponding alert category or sub-category. Clicking on a category or sub category filters alerts accordingly and refreshes the alert list.
Priority
Displays alerts that have corresponding alert priority. Selecting a new priority filters alerts accordingly and refreshes the alert list.
Alert Generation Date
Displays alerts that were generated within or equal to the ‘From’ and ‘To’ dates. Supply a date range and click the Filter button. This filters alerts accordingly and refreshes the alert list.
Job ID
Displays alerts that reference corresponding job. Enter the job id and click the Filter button. This filters alerts accordingly and refreshes the alert list.
Customer
Displays alerts that reference corresponding customer. Click the Customer button and select the customer you want to filter by. Then click the Filter button to filter alerts accordingly and refresh the alert list.
Vendor
Displays alerts that reference corresponding vendor. Click the Vendor button and select the customer you want to filter by. Then click the Filter button to filter alerts accordingly and refresh the alert list.
Work Order
Displays alerts that reference corresponding work order. Enter the work order number and click the Filter button. This filters alerts accordingly and refreshes the alert list.
Purchase Order
Displays alerts that reference corresponding purchase order. Enter the purchase order number and click the Filter button. This filters alerts accordingly and refreshes the alert list.
Opening Related Records from Alert Browser
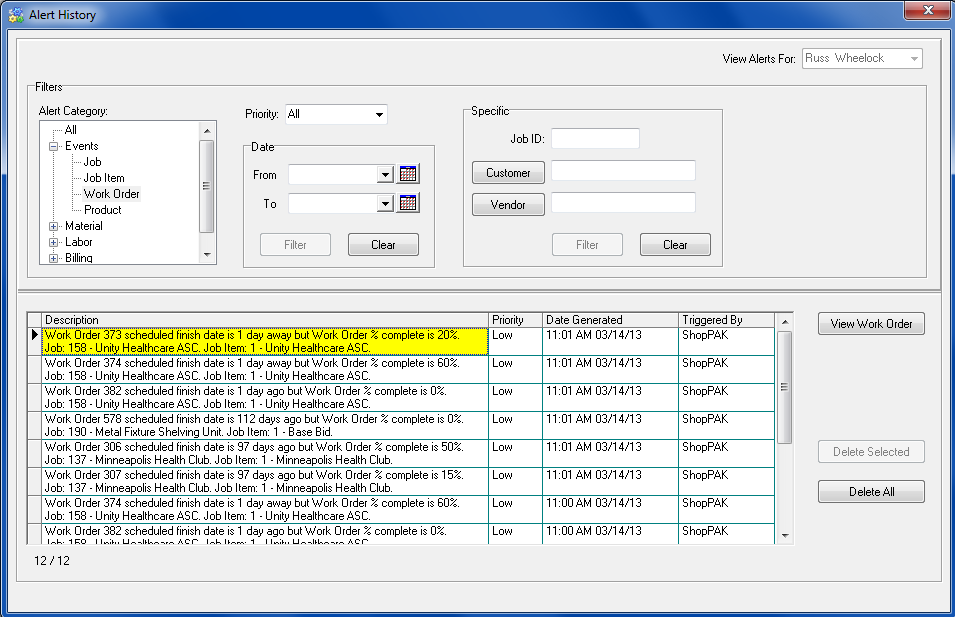
The Alert Browser enables you to open related records that are referenced in an alert including job, job item, work order, purchase order, ship ticket, and inventory item. The nature of the alert determines the type of record that ShopPAK will automatically opened. In the example below, we have a work order alert that references a particular work order à 373:
Since the alert is work order oriented, ShopPAK changes the “View” button’s text to say “Work Order. Clicking the “View Work Order” button automatically navigates to the Jobs tab, opens and adds the job to the job tree, selects work order #373, and displays the work order details form.

Automatically bringing up related records from the Alert Browser saves time. Moreover, since the Alert Browser is modeless, you can interact with any part of ShopPAK….without having to first close the Alert Browser! It can stay open and running, allowing you to bounce between it and other ShopPAK windows and forms as needed.
Delete Selected Alert
1. Select the alerts you want to delete by clicking on their row buttons. Note: If selecting multiple alerts, hold down your CTRL keyboard button to keep prior selections.
2. Click the “Delete Selected” button.
3. If you want to continue with the deletion, click “Yes” when the warning message displays.
Delete All Alerts
1. Click the “Delete All” button. This tells ShopPAK you want to delete ALL of the alerts currently in the alert grid.
2. If you want to continue with the deletion, click “Yes” when the warning message displays.